Simple steps for activating Azure Information Protection for Microsoft 365
Welcome to our blog on the high-level activation of Azure Information Protection for Office 365. As an organization, you probably want to protect your confidential information and ensure that it is only accessible to the right people. Azure Information Protection is a service from Microsoft that can help you protect this confidential information through classified and flagged documents and emails.
In this blog, we will show you how to activate Azure Information Protection at a high-level for your Office 365 Tenant. We'll walk you through the process step by step and show you how to configure the service to meet your organization's needs. We'll also provide some tips on how to get the most out of Azure Information Protection. So let's quickly get started activating Azure Information Protection for your Office 365 Tenant .
What is Azure Information Protection for Microsoft 365?
Azure Information Protection (AIP) is a cloud-based solution that allows organizations to classify and protect documents and emails by applying labels. Labels can be applied in the following ways:
- Automatically by administrators using rules and conditions
- Manually by users manually.
- Through a combination where administrators define the recommendations shown to users. Tooltips.
For example, the administrator can configure a label with rules that detect sensitive data, such as credit card information. In this case, any user who saves credit card information in a Word-file can see a tooltip at the top of the document with a recommendation to apply the relevant label for this scenario.
A practical tip: Start testing on a test environment or testtenant. Information protection is best worked out in a pre-production environment first and then brought to your production environment. create a test tenant via this blog.
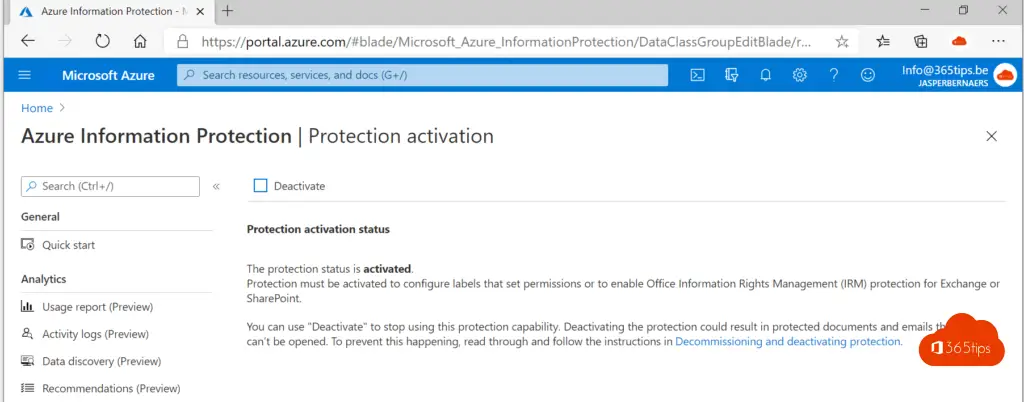
Start from the Azure Admincenter
Browse to: https://portal.azure.com/ or use the direct link to the activation page: https://portal.azure.com/#blade/Microsoft_Azure_InformationProtection/DataClassGroupEditBlade/rmsSettingsBlade
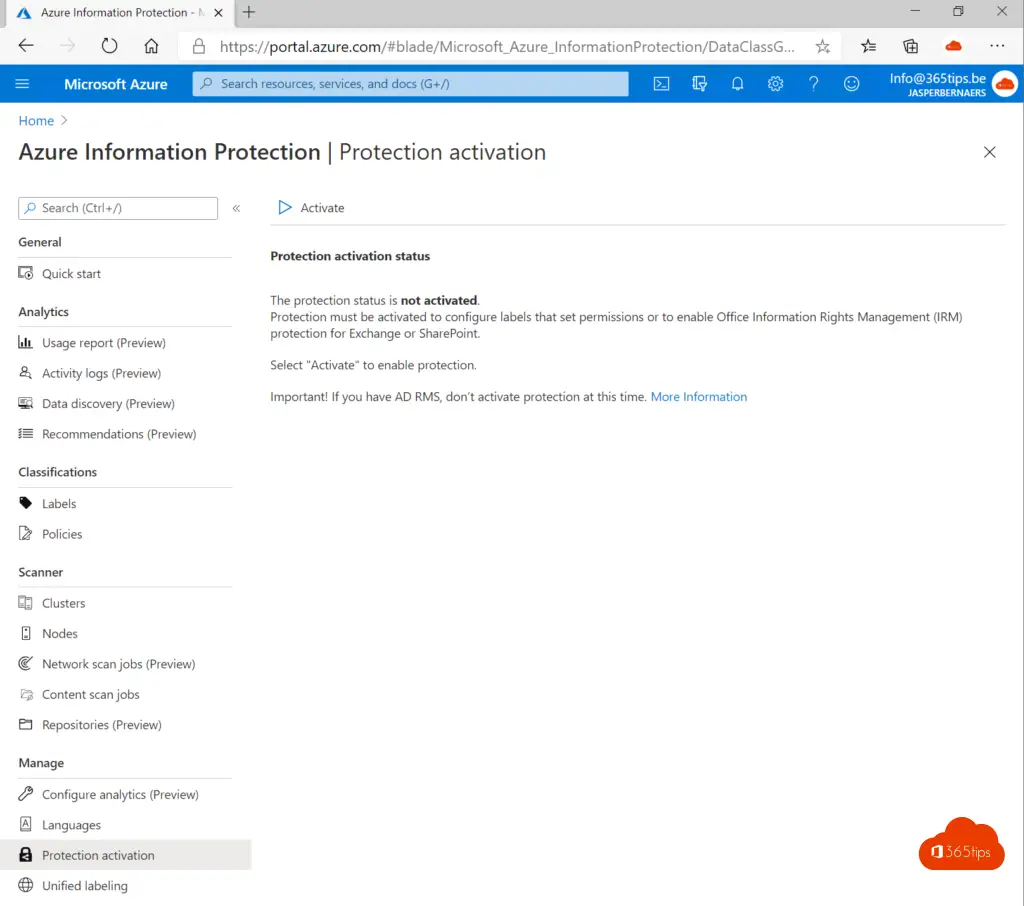
Press activate at the top left
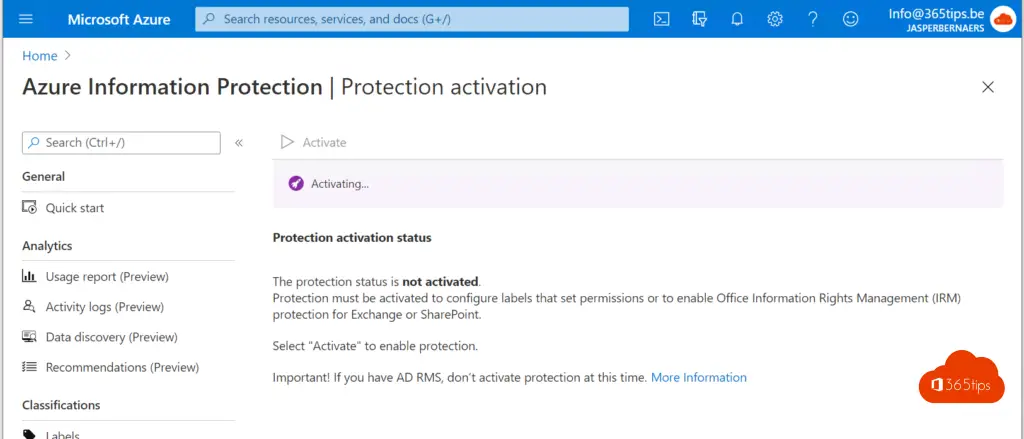
Complete installation
Wait for the activation to complete.
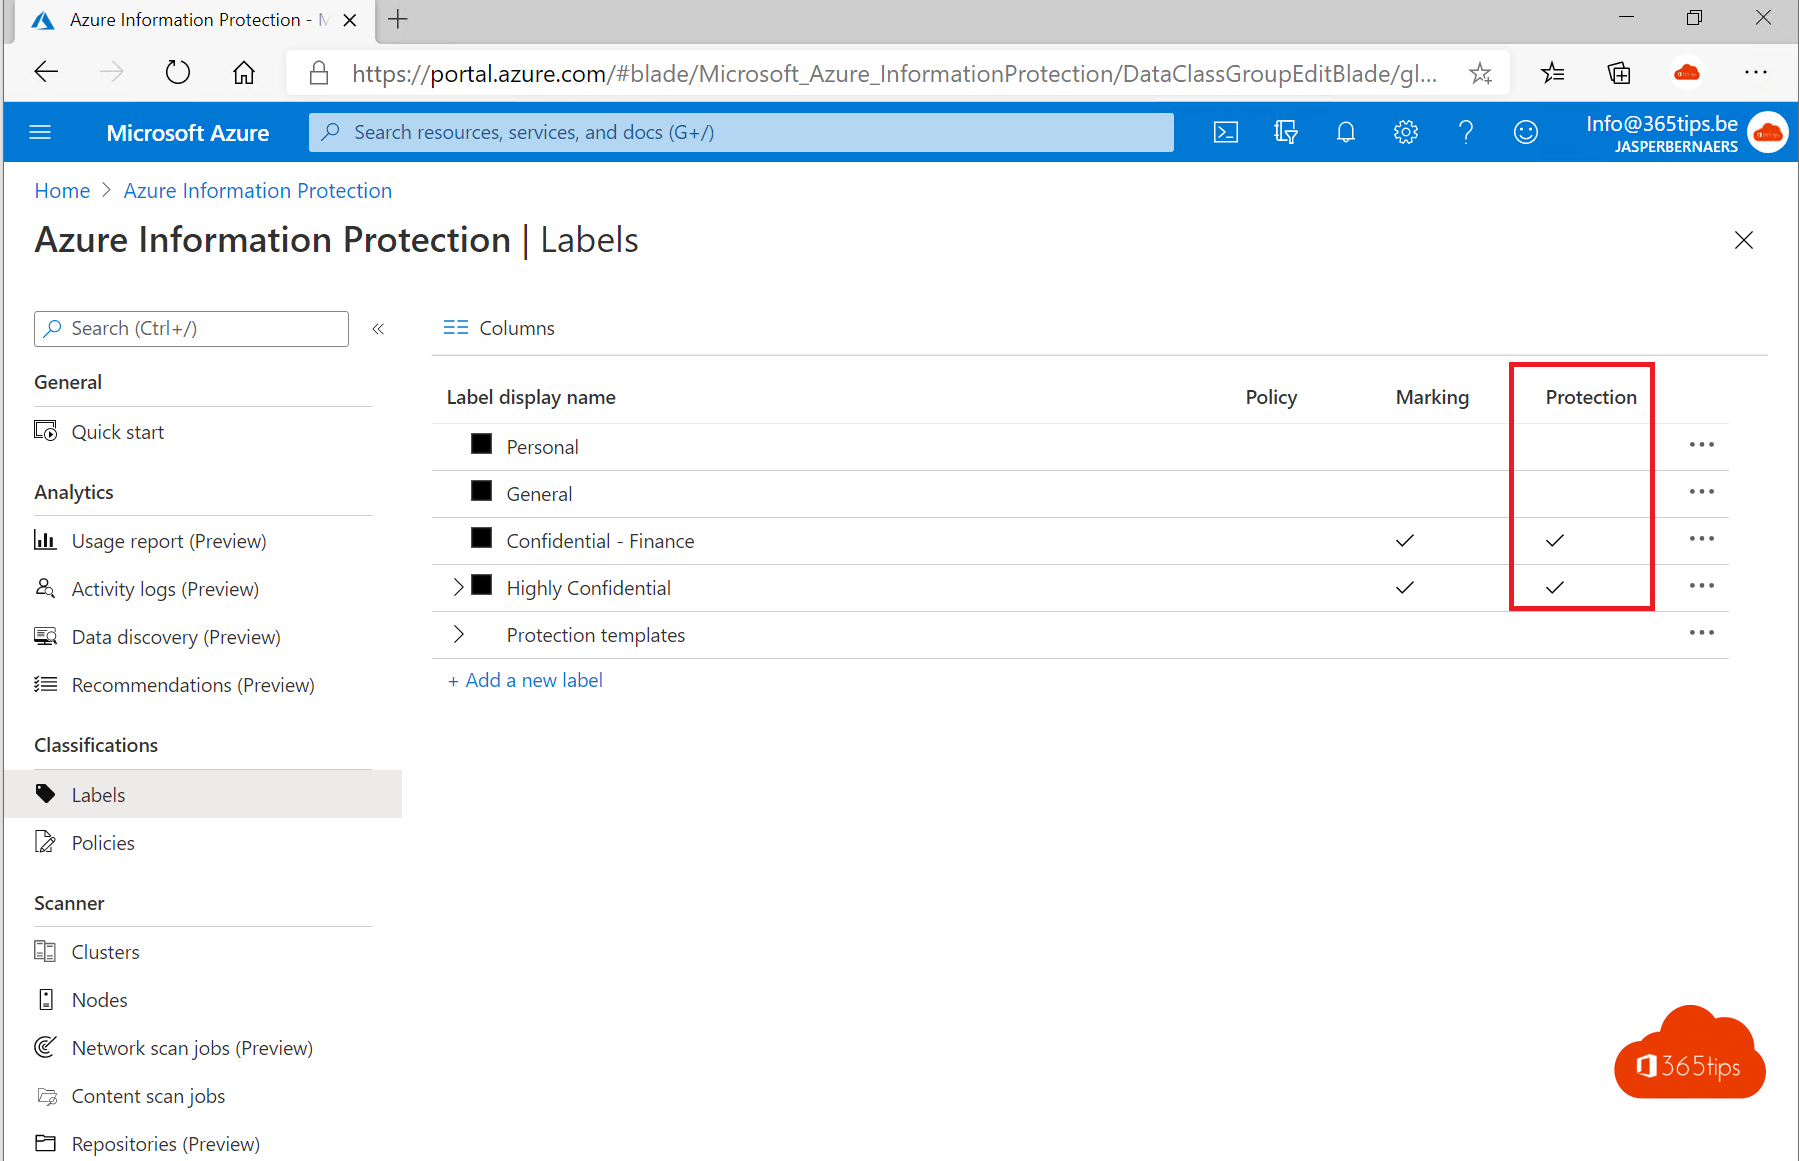
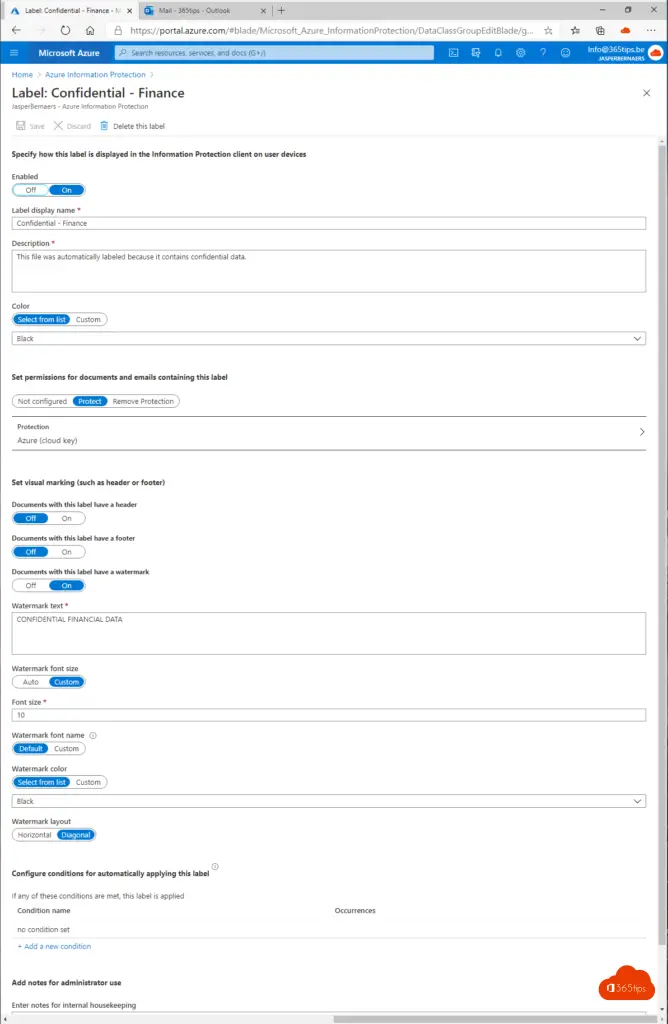
Standard labels
The default labels can be found here. Practically speaking, labels that have a protection 'activation' ✓ on them only have the right influence. These are truly protected.

This is a sample policy for Azure Information protection
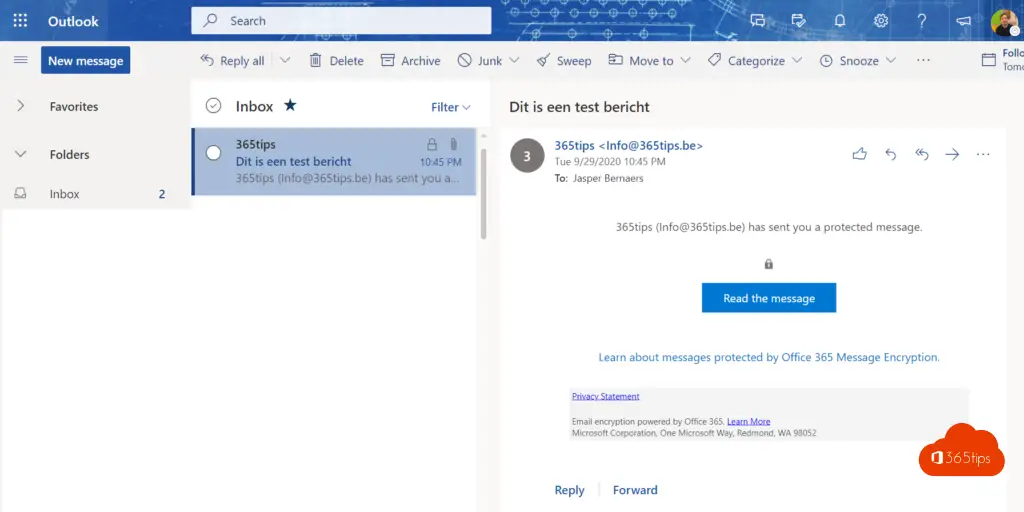
Practical test in Outlook Online
Open your Outlook online at: https://outlook.office.com/mail/inbox
Create a test email, and use a label that has protection checked ✓.
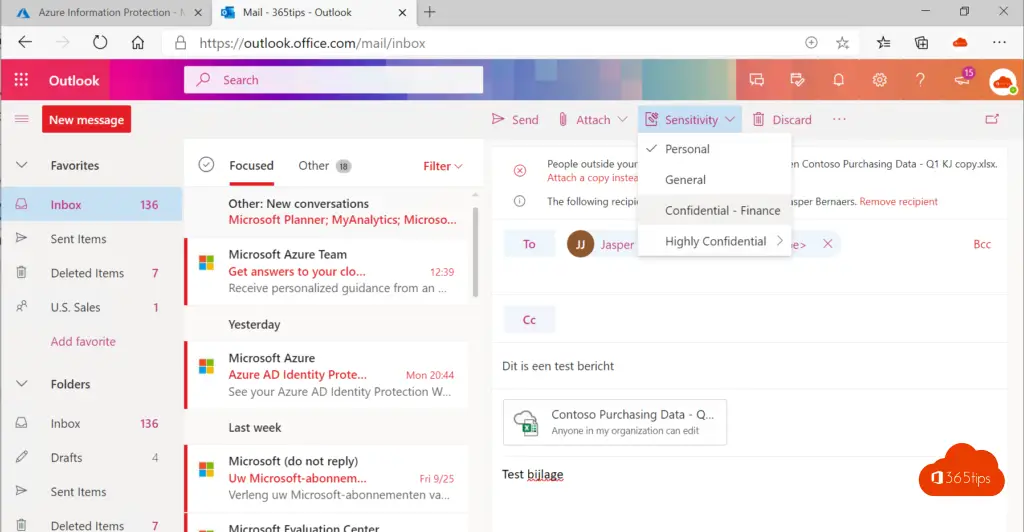
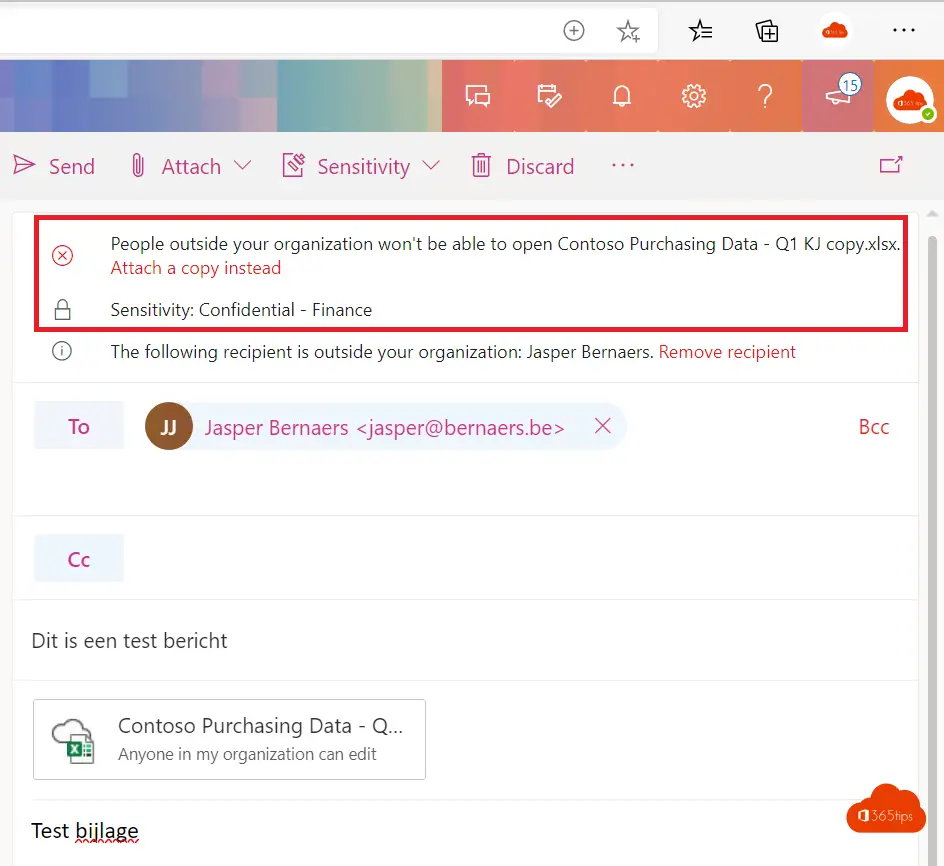
Important here are 2 things.
In this mail, anyway, you get the message that you will mail externally. Not internally. Good to know.
You'll see under sensitivity it says: Confidential - Finance. This label had a protection label on.
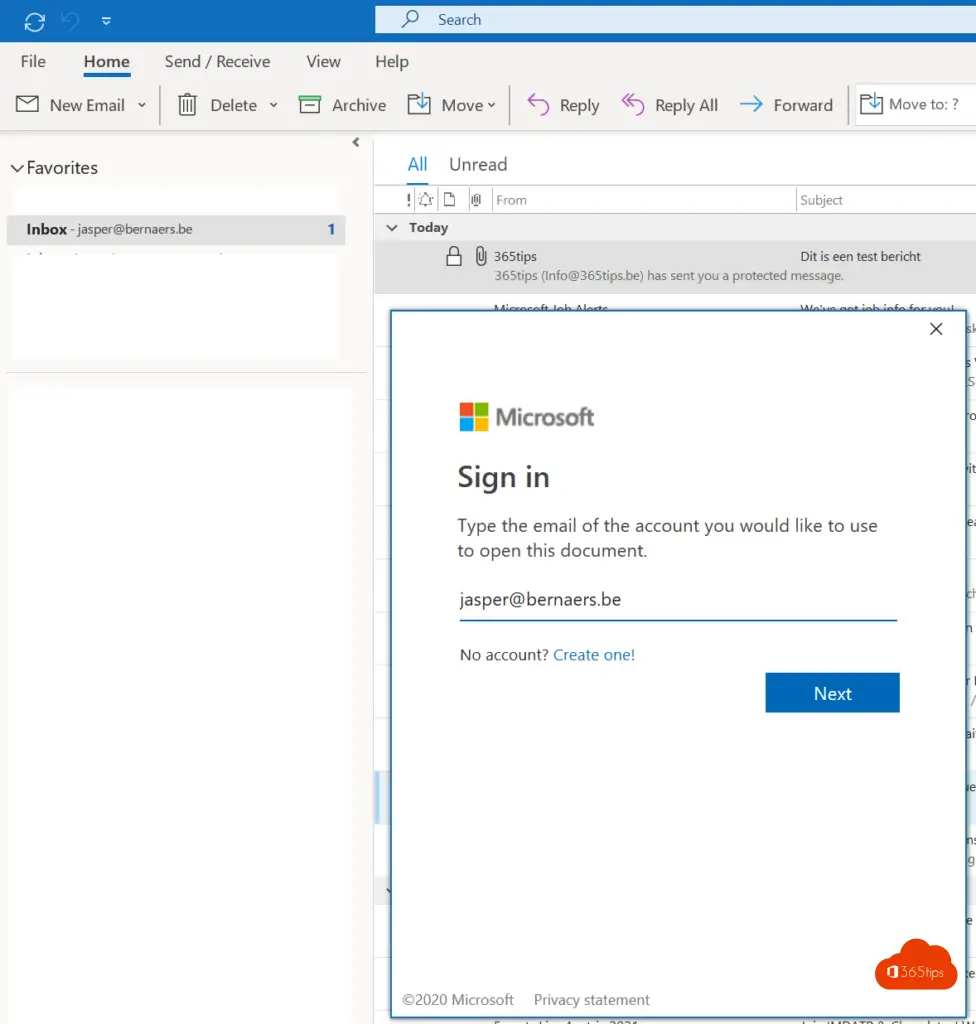
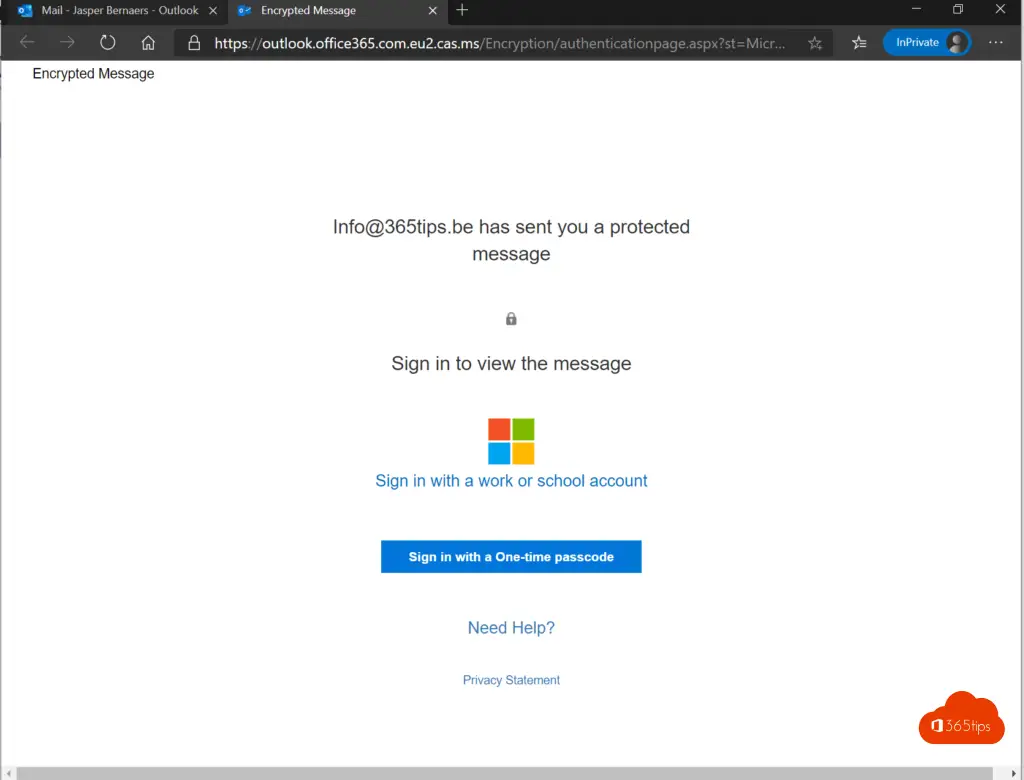
Test through the receiver
Best to test in Outlook or Online Online . Both scenarios are relevant to test. Information protection is something that really needs deep testing before rolling out to the entire organization.
Press read this message on the recipient's side.
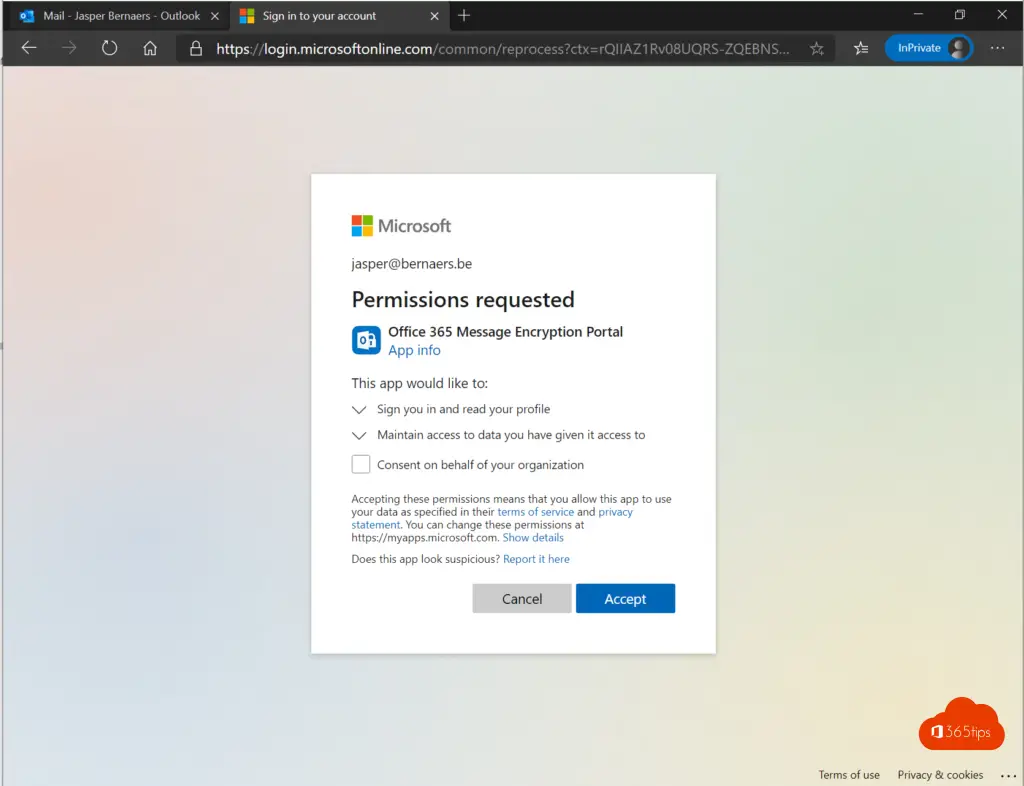
Provide access as needed.
Or use Microsoft Outlook
Log in an extra time to make sure it's you.