📙 Tutorial: Adding Email alias in Office 365, Exchange or Active-Directory
There are several ways to add email aliases to Office 365. In this blog, we will look at the different methods you can use to add an alias.
The first method we will discuss is the "Cloud only" method. This means that the identities, groups or mailboxes are not known in the on-premises exchange or on-premises Active Directory (AD).
Next, we will explain how to set up an alias in a Exchange-hybrid environment, where the identities are known in the Active Directory. These identities are on-premises and synchronized with Azure AD via Azure AD Connect.
This procedure works for mailboxes, groups, resources, shared mailboxes, equipments and spaces. If you still have questions or experience ambiguities, please don't hesitate to leave a comment in the chat at the bottom of this blog.
What is an alias in Office 365?
A Exchange-alias in Office 365 is an additional e-mail address associated with a user's account. This can be useful if you want to give users the ability to receive e-mail at multiple addresses.
To add a Exchange alias to a user's account, go to the Office 365 management center. Go to the "Users" section and select the user you want to add an alias to. Then go to the "Email addresses" tab and click "Add." Enter the e-mail address you want to use as an alias and select the appropriate domain, then click "Save."
Once the alias is added, users can receive e-mail at both the primary e-mail address associated with their account and the additional alias address. They can also choose which address to use when sending email and can switch between addresses as needed.
In general, Exchange-aliases in Office 365 can be a useful feature because they provide flexibility and convenience for users who need to use multiple e-mail addresses.
How to add an alias in Office 365 - Cloud only
Cloud Only means you don't have identities, distribution groups or shared mailboxes synchronized from the local Active Directory server.
Adding an alias through Exchange Control Panel
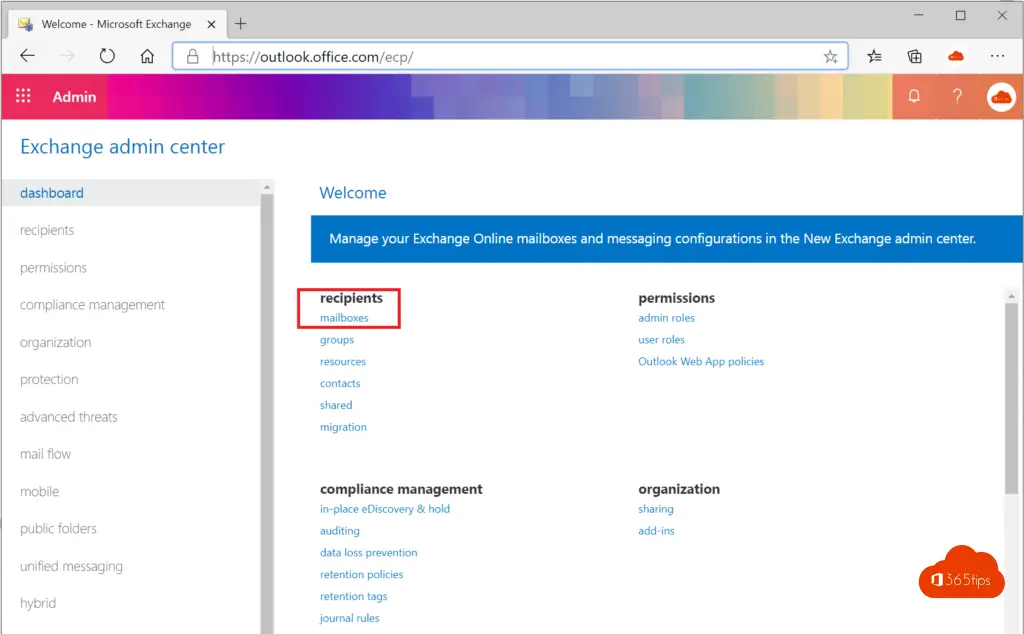
Browse to the Exchange Control Panel: http://outlook.office.com/ecp
Select mailboxes
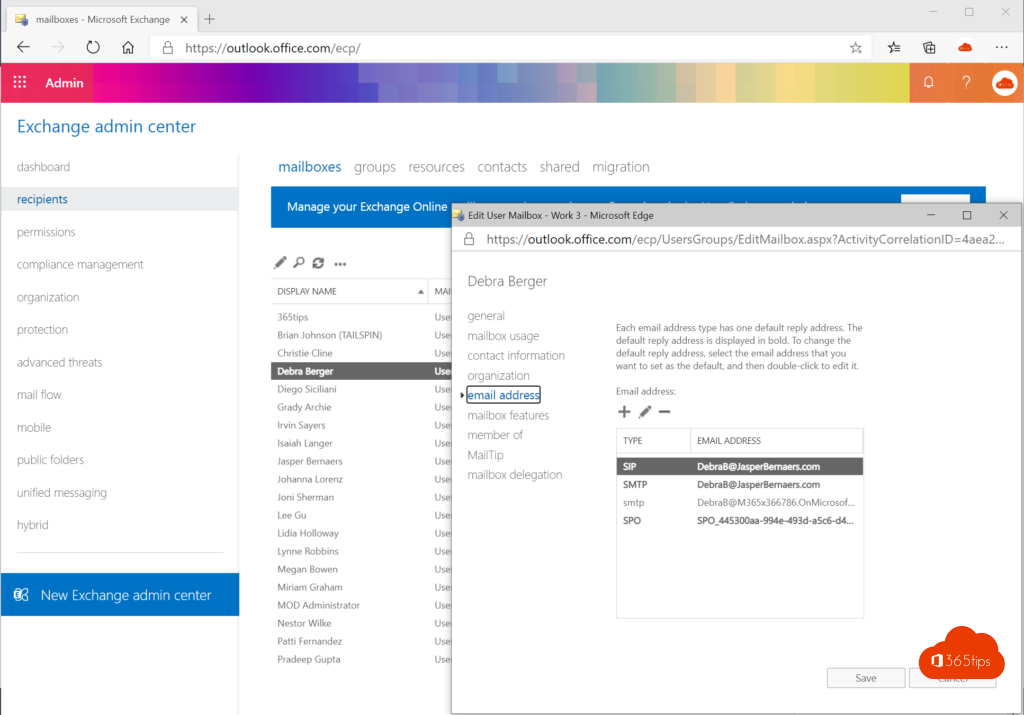
Choose a user, group, shared mailbox where you wish to add an alias.
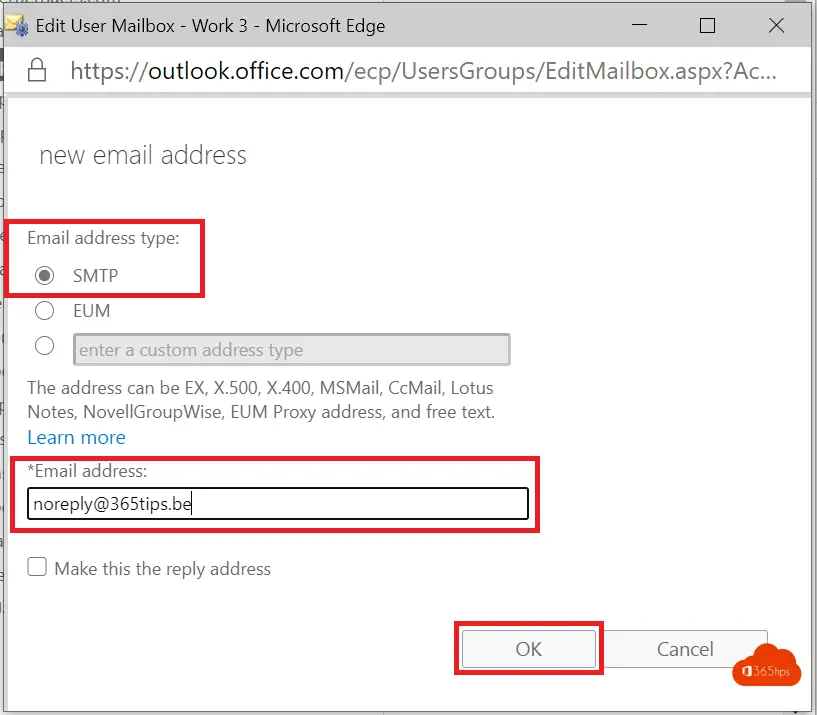
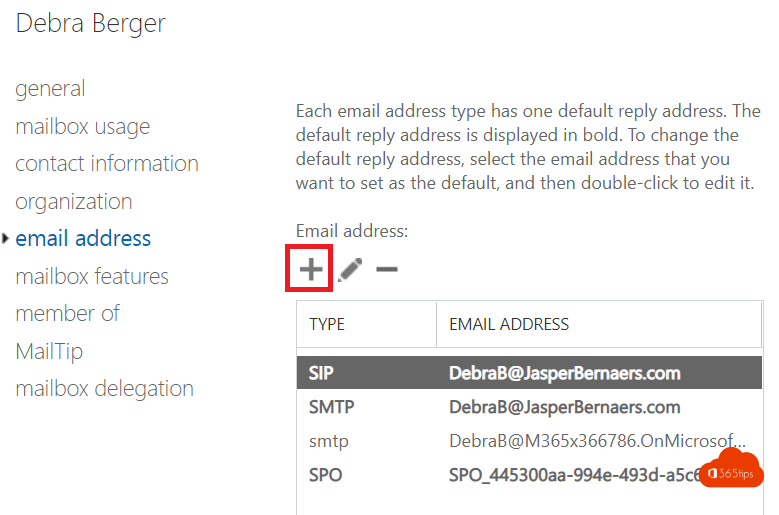
Then select email address.
Select +
Select email address type: SMTP
Enter an email address
Choose OK

Your alias has been successfully added.
How to add an alias through Microsoft's Admin Center
Navigate to: https://admin.microsoft.com/
Find the desired user
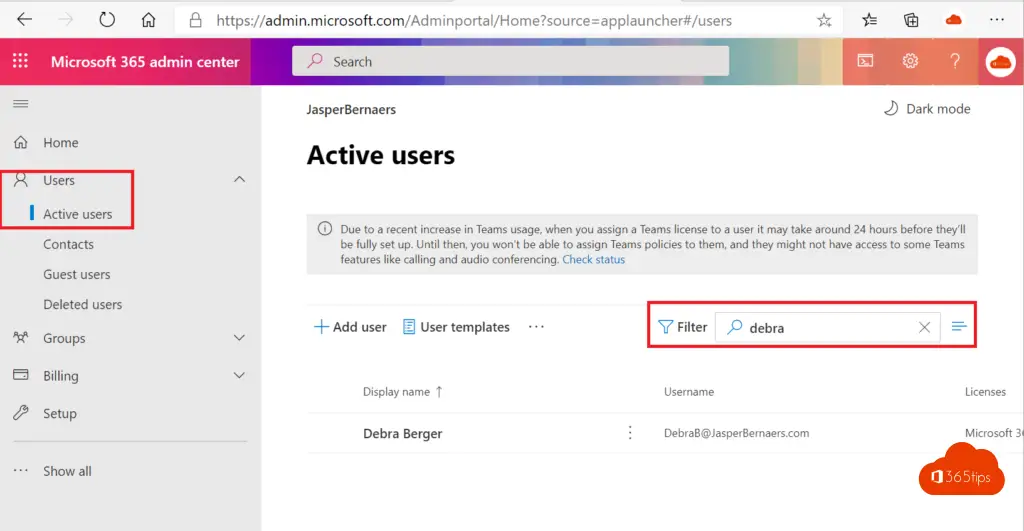
Open the user settings by pressing the name.
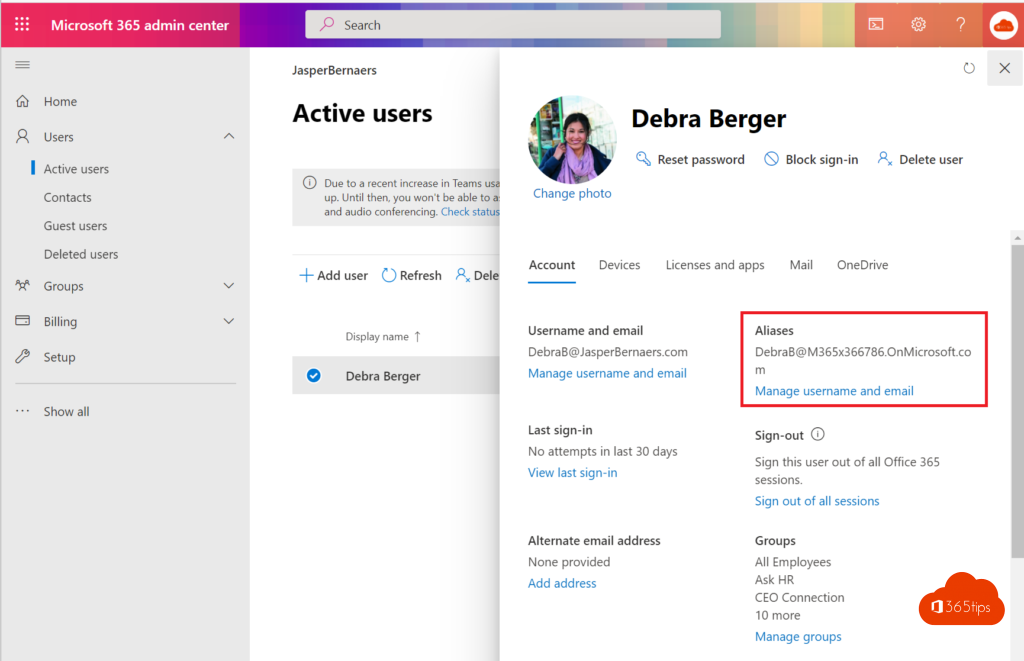
Add the alias in the field below
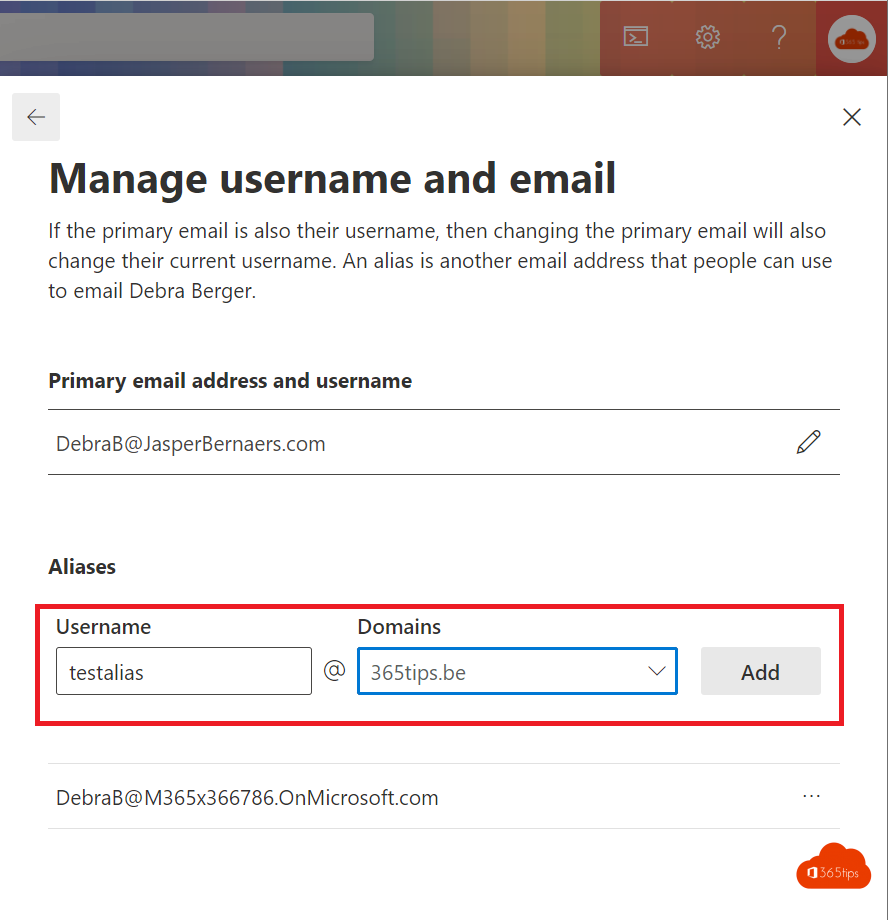
Select Add.
This operation can also be used with a shared mailbox.
How to add an alias in Exchange Online add via PowerShell?
Login to Exchange Online via these commands and add an alias via this command.
Connect-ExchangeOnline
Set-Mailbox "info" -EmailAddresses @{add="info2@365tips.be"}
On-premises can do this with the remote-mailbox command:
Set-RemoteMailbox "info" -EmailAddresses @{add="info2@365tips.be"}
On-premises management of mail properties
This approximate procedure is valid for Exchange 2007, 2010, 2013, 2016 and 2019.
If you sync users, groups from the local Active Directory servers then it is also necessary to do 'recipient management' there.
In a hybrid scenario, you have Recipient management on-premises. And mailbox permissions online.
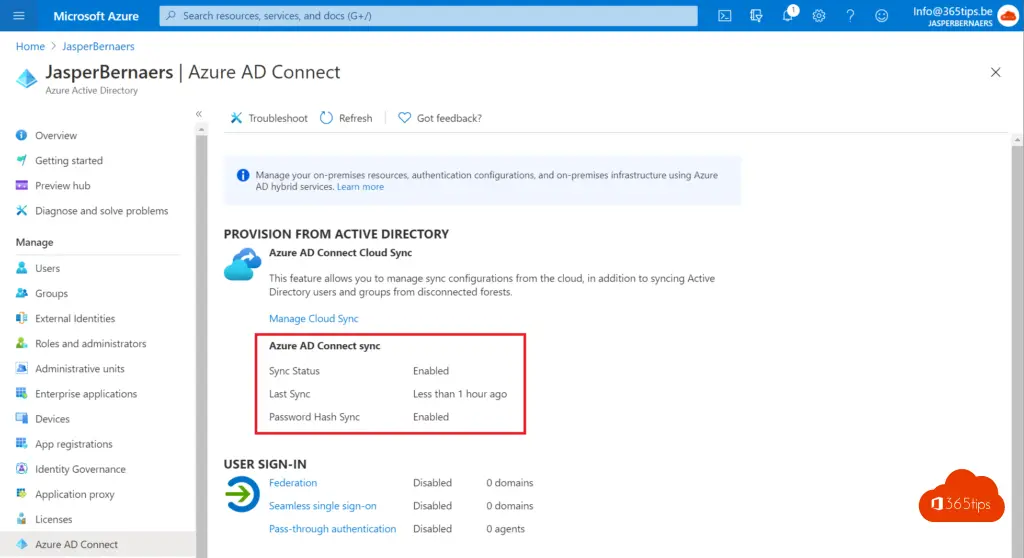
You can check in Azure AD if users are synced via: https://portal.azure.com/#blade/Microsoft_AAD_IAM/UsersManagementMenuBlade/MsGraphUsers
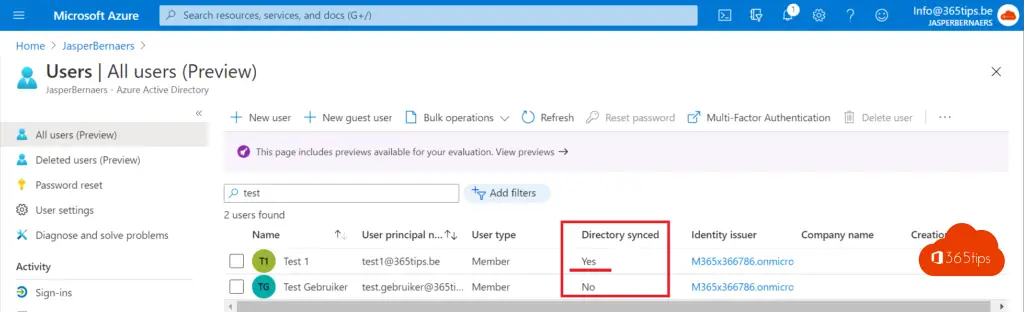
Or via Azure Active Directory - Azure AD connect Blade - https://portal.azure.com/#blade/Microsoft_AAD_IAM/ActiveDirectoryMenuBlade/AzureADConnect
You may get these error messages:
- An Azure Active Directory call was made to keep object in sync between Azure Active Directory and Exchange Online . However, it failed. Detailed error message: Unable to update the specified properties for on-premises mastered Directory Sync objects or objects currently undergoing migration. RequestId : 2b848154-0873-.... The issue may be transient and please retry a couple of minutes later. If issue persists, please see exception members for more information.
- The operation on mailbox "First Last" failed because it's out of the current user's write scope. The action 'Set-Mailbox', 'EmailAddresses', can't be performed on the object 'First Last' because the object is being synchronized from your on-premises organization. This action should be performed on the object in your on-premises organization.
You can then adjust these settings on the on-premises AD because recipient management is an on-premises power.
Open the local Active Directory Users & Computers.
At the top, select 'view' -> Advanced Features
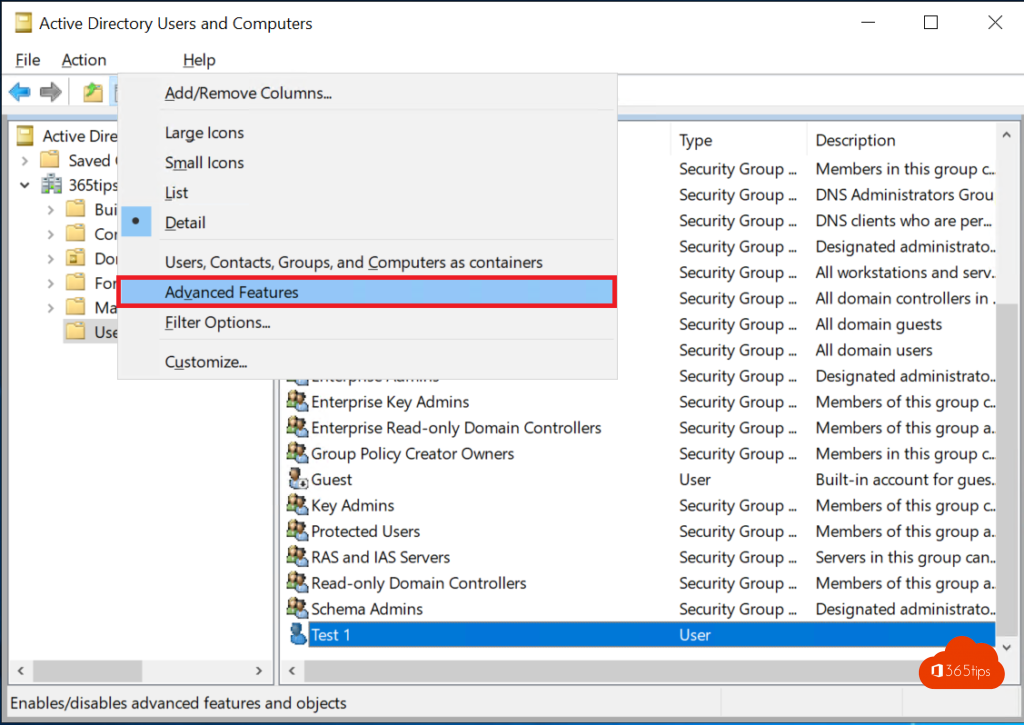
Open the desired user -> Select properties.

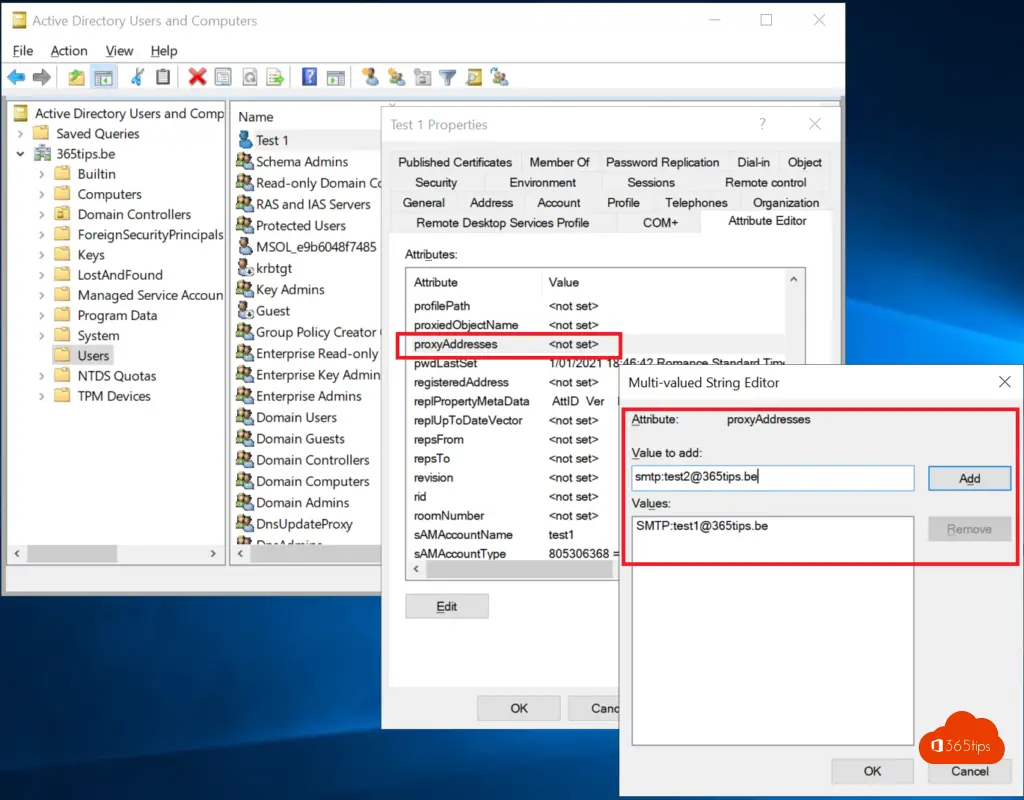
Add an alias attribute through Active Directory.
Select on User Properties -> Attribute Editor
Add an smtp:test2@365tips.be at proxyAddresses . (prefix + suffix / domain)
Force a Azure AD Sync through this blog - to ensure that email address changes will be syncted to Office 365 .
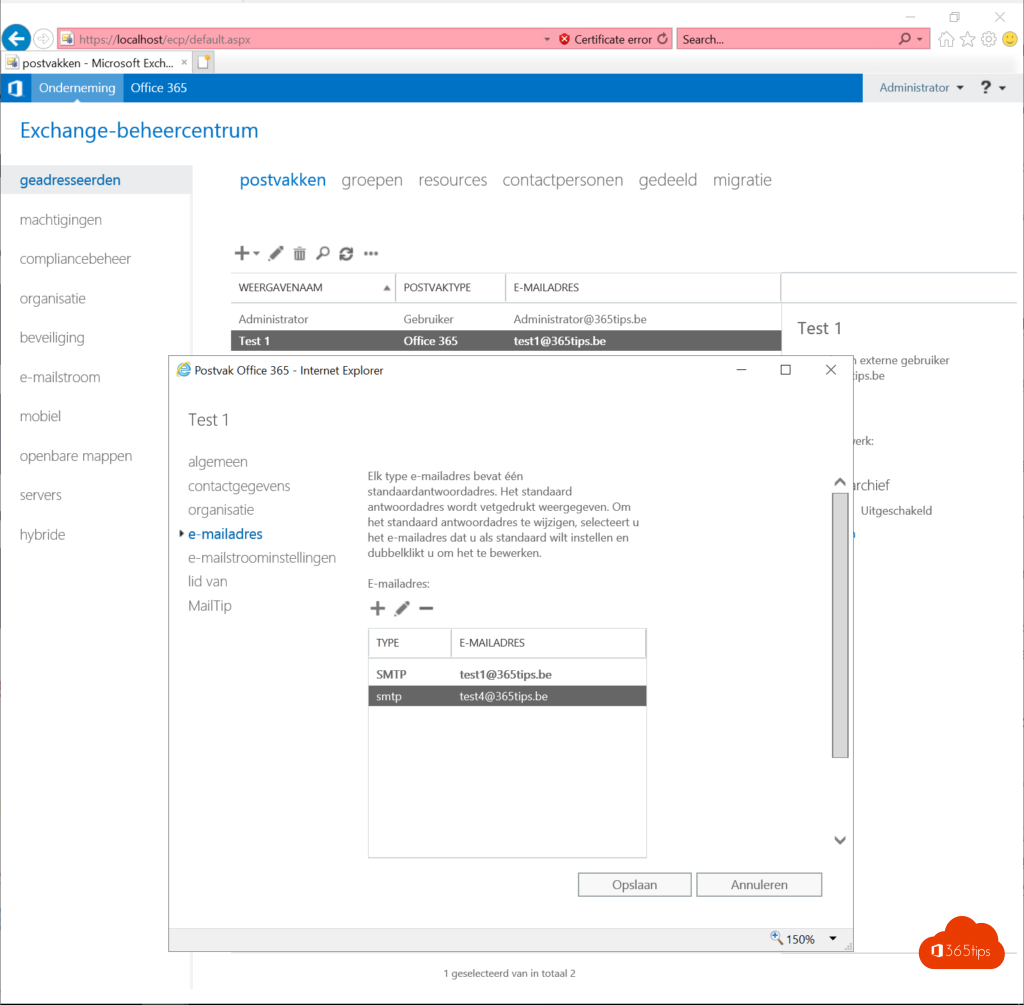
The alias has been added. You can validate this via: https://outlook.office.com/ECP
Find the user - Select email addresses.
Validate that the aliases are set.
Add an alias in Exchange on-premises and sync it to Office 365
Browse on the on-premises exchange server to: the ECP URL and log in with a Exchange Administrator or with a Domain Administrator Account.
Navigate to: https://localhost/ecp/
Select Mailboxes -> Choose the desired mailbox.
Changed e-mail addresses.
Do a Azure AD Sync:
Start-ADSyncSyncCycle -PolicyType Delta
The aliases are now synced to Azure AD / Office 365.
Add an alias in Exchange Online via PowerShell
Login to Exchange Online via these commands and add an alias via this command.
'Connect-ExchangeOnline'
Set-Mailbox "info" -EmailAddresses @{add="info2@365tips.be"}
On-premises can do this with the remote-mailbox command:
Set-RemoteMailbox "info" -EmailAddresses @{add="info2@365tips.be"}
Also read
Restore a mailbox to another mailbox when deleted -. Exchange Online
Restore (restore) Exchange emails - New Exchange Portal - Online
Install the new Exchange Online PowerShell V2 module
Mailbox management via Hybrid Exchange
