Here's how to activate DKIM in Microsoft 365 and improve your email security

In today's digital age, email security is paramount for businesses and organizations. Protecting your emails from unauthorized access, phishing and spoofing is essential to maintaining your brand reputation and trust with customers. An important way to strengthen your email security is by using DomainKeys Identified Mail (DKIM) in Microsoft 365. In this article, we will take you step-by-step through the process of activating DKIM in Microsoft 365 so you can ensure a more secure email experience for your organization.
What is DKIM (DomainKeys Identified Mail)?
DKIM (DomainKeys Identified Mail) is an e-mail security standard designed to ensure that messages are not altered in transit between sender and recipient.
So DKIM allows you to add a digital signature to outgoing e-mail messages in the message header. When you configure DKIM, you give the domain permission to attach the domain name to an e-mail message using cryptographic authentication. In other words, a sort of signature of your domain. E-mail systems that receive e-mail from your domain can use this digital signature to determine if the incoming e-mail is genuine.
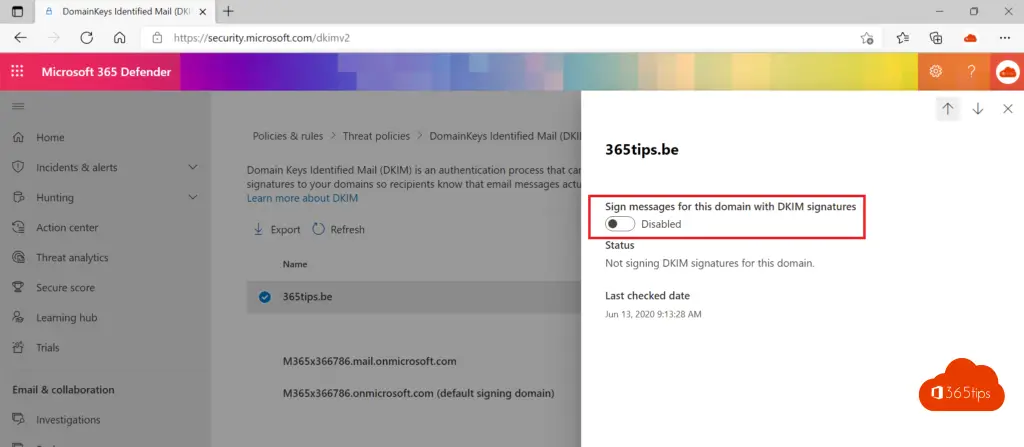
How can you activate DKIM yourself in Microsoft 365?
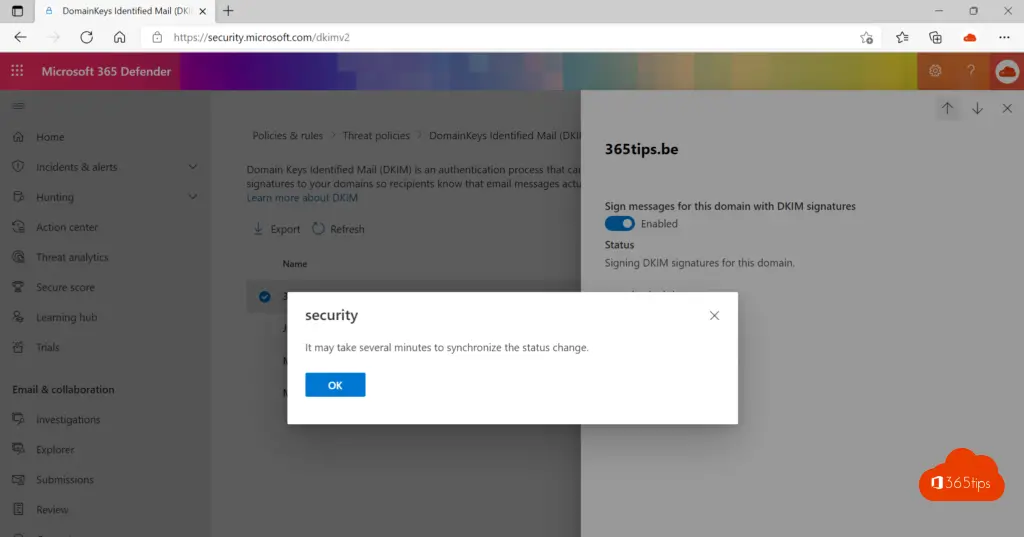
Select the domain on which you want to configure DKIM on the DKIM page.
https://security.microsoft.com/dkimv2
or https://protection.office.com/dkimv2
Enable DKIM by clicking on the domain.
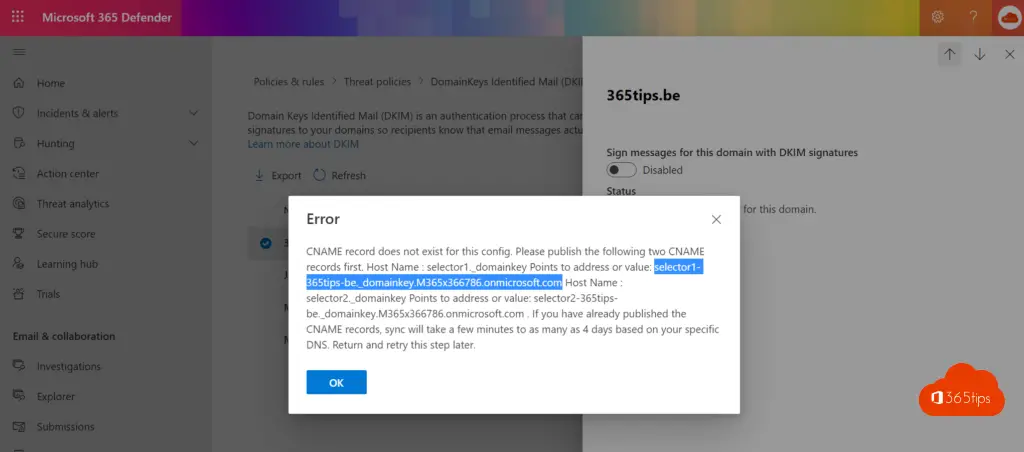
You get this error message when an attempt to activate DKIM fails.
The reason why you are getting this error message is because DNS settings have not been added for DKIM.
CNAME record does not exist for this config. Please publish the following two CNAME records first. Host Name : selector1._domainkey Points to address or value:
selector1-365tips-be._domainkey.M365x366786.onmicrosoft.com
Host Name : selector2._domainkey Points to address or value:
selector2-365tips-be._domainkey.M365x366786.onmicrosoft.com
If you have already published the CNAME records, sync will take a few minutes to as many as 4 days based on your specific DNS. Return and retry this step later.
Login to the domain portal to adjust DNS settings for DKIM
As in this blog, where you can configure the primary DNS settings, it is important that the selectors are also placed.
Open the domain-administrators panel where you registered your domain name.
You can copy these 2 DNS records from the DKIM panel above. (See screenshot above, in red)
Add the 2 DNS CNAMES to the control panel with the desired domain and the appropriate 'tenantname'
selector1-domain-com._domainkey.tenantname.onmicrosoft.com
selector2-domain-com._domainkey.tenantname.onmicrosoft.com
Example of 365tips.be
selector1-365tips-be._domainkey.M365x366786.onmicrosoft.com
selector2-365tips-be._domainkey.M365x366786.onmicrosoft.com
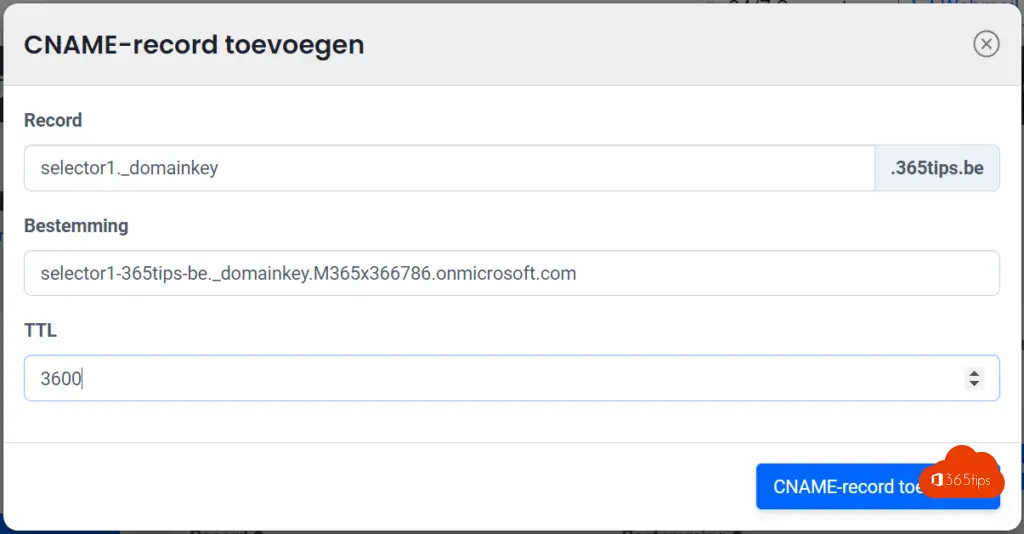
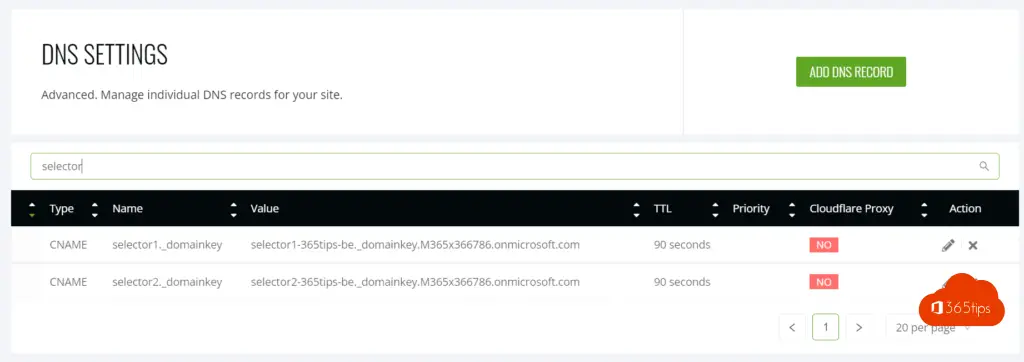
Example of both DNS CNAME settings.
Activate DKIM after the DNS settings
Activate via: https://security.microsoft.com/dkimv2 -> again DKIM.
DKIM is now activated and can be used for the configured domain.
Learn more at Microsoft Docs.
Also read
How to use the latest version of Apple Passwords in iCloud for Windows?
Managing app passwords for legacy applications - Multi-factor authentication
How to password protect emails in Microsoft 365 or Outlook?
