📧 How to restore a Exchange mailbox to another mailbox during deletion
When deleting a mailbox, you don't want to lose data. It is not simple to perform tasks like mailbox recovery in Office 365.
That's why I created this blog to help migrate data from an old mailbox to a new one.
Don't think of it as backup... But the ideal scenario is when someone leaves employment, that you can import all items into another mailbox. OR in the case of an acquisition or merger.
There are 3 options:
- Either keep the mailbox in its current state(1). And keep it active with a license in use.
- Or convert it to sharedmailbox(2). And the data remains intact without a single manipulation - or conversion to sharedmailbox.
- A 3rd option is to delete this mailbox and migrate the data into another mailbox. A mailbox that is in use. In this blog, I explain how to restore the data to another mailbox. (3)
Restoring deleted items can be done via the new Exchange Control Panel.
Prerequisites to connect to PowerShell
Install the Exchange PowerShell modules via this blog.
Install the Azure AD Powershell module via here.
Change the UserPrincipalName of the user you wish to delete
It is a choice to change the UPN before removing the user. From experience, you better do this. Because otherwise soon you won't be able to transfer this UPN and the e-mail address.
Set-MsolUserPrincipalName -UserPrincipalName shared1@365tips.be -NewUserPrincipalName bepidf@etexgroup.onmicrosoft.com
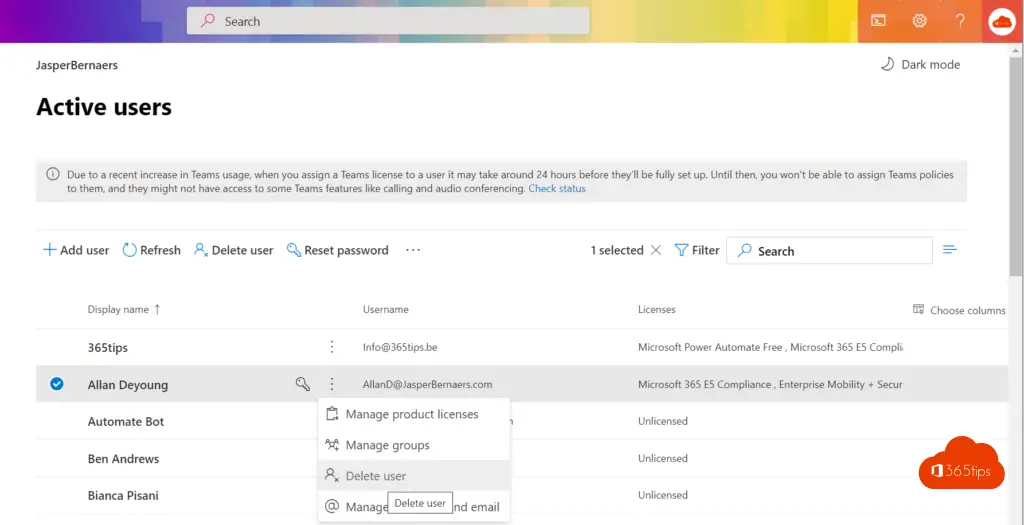
Delete the desired Office 365 user from whom you later wish to recover emails
Delete a shared mailbox or a user via admin center.
Connect-MsolService
Get-MsolUser -ReturnDeletedUsers
Remove-MsolUser -UserPrincipalName AllanD@Jasper********.com -RemoveFromRecycleBin -Force
Force user removal: RemoveFromRecycleBin -Force

Connect to Exchange Online via PowerShell
In this blog, you can learn more about Exchange Online .
Connect to Exchange online via: Connect-Exchange Online .
Enter your username and password (Global Administrator).
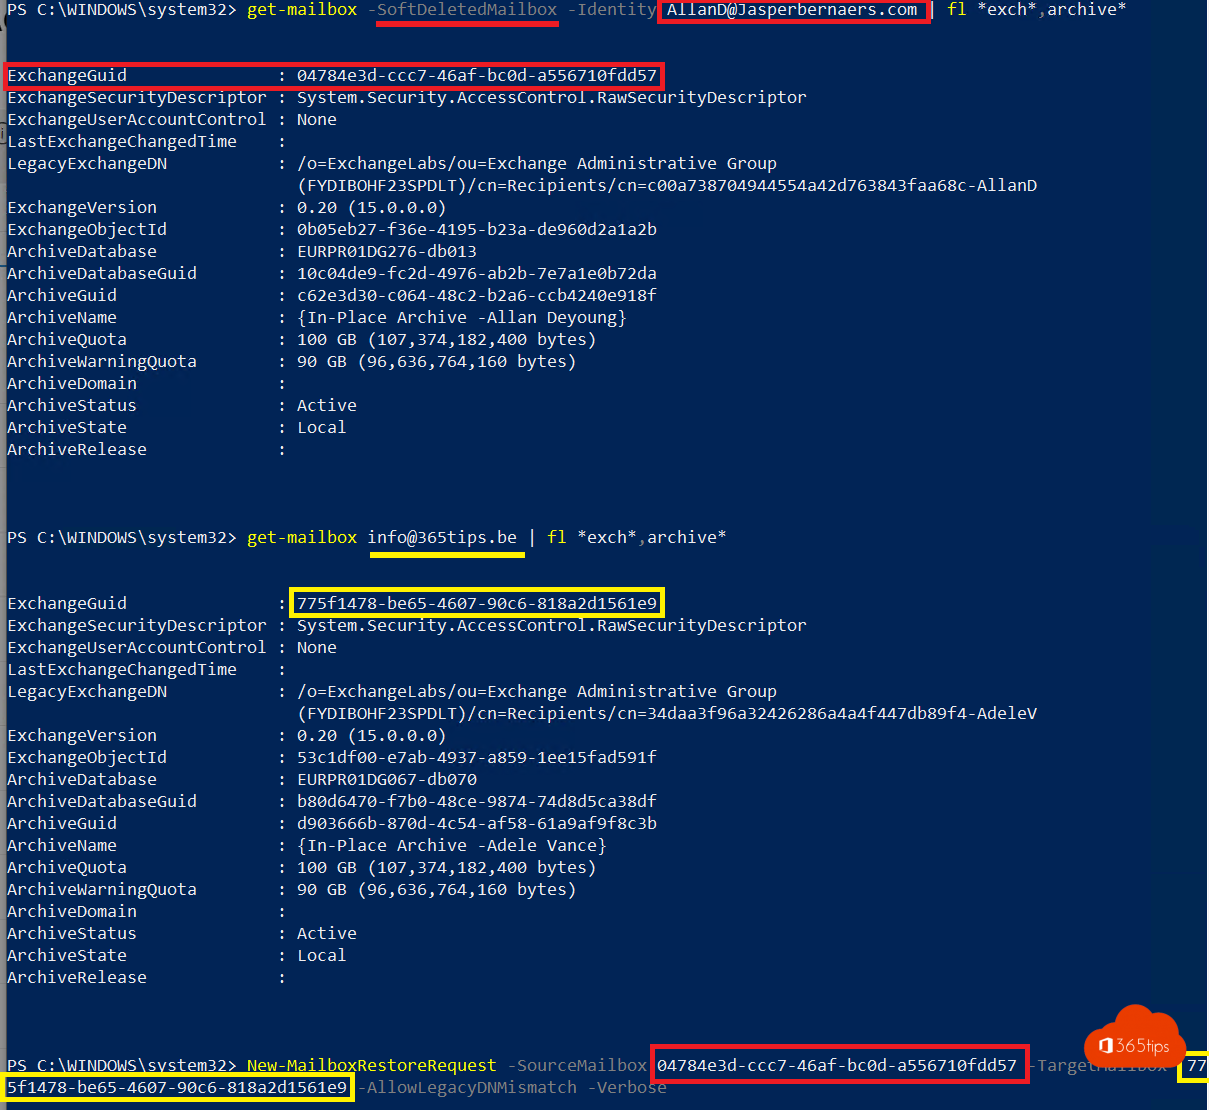
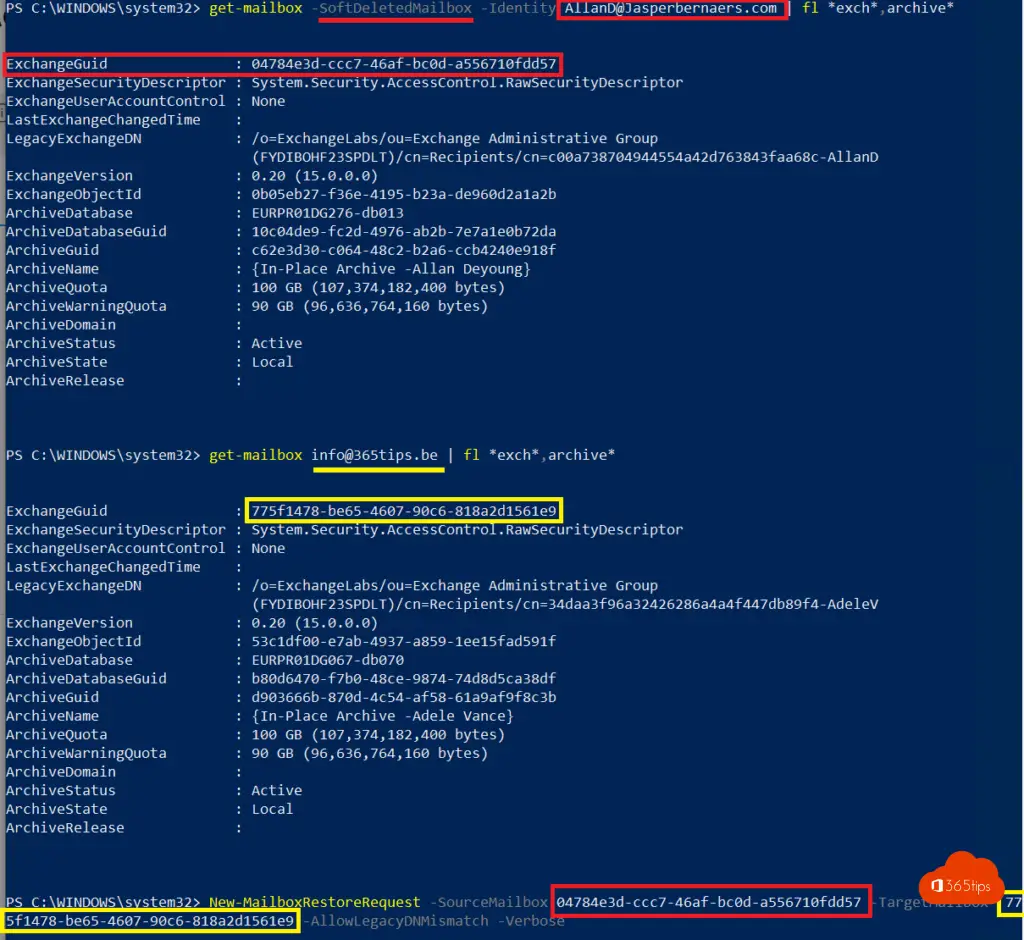
Connect-ExchangeOnline
get-mailbox -SoftDeletedMailbox -Identity AllanD@********.com | fl exch,archive*
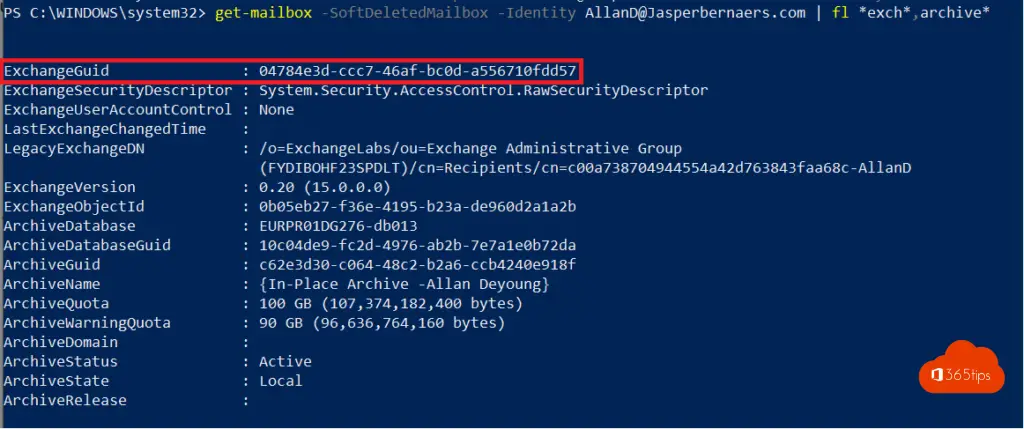
Copy the ExchangeGuid to notepad to keep track.
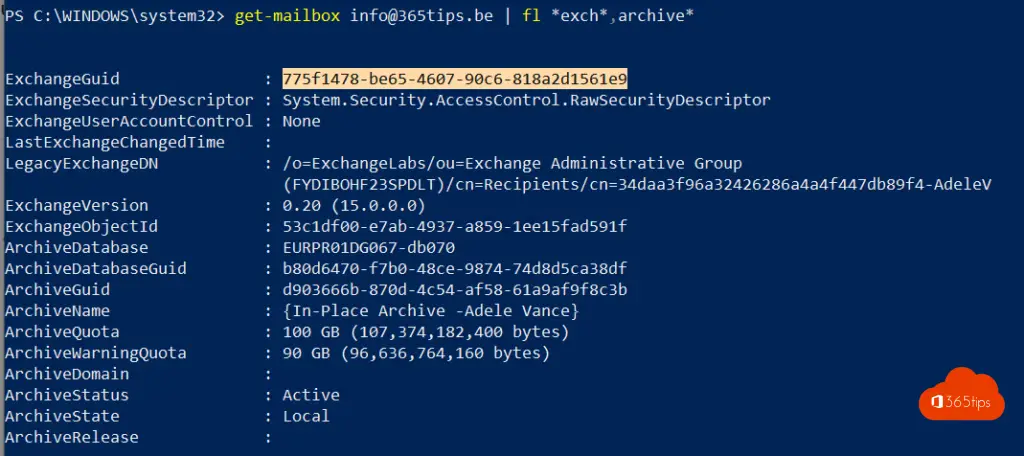
Retrieve the Exchange Mailbox to where you wish to import the mail items
get-mailbox info@365tips.be | fl exch,archive*
Create the job to convert the old mailbox contents to the new mailbox
Build the MailboxRestoreRequest using this formatting.
SourceMailbox = Exchange Guid of the deleted mailbox.
TargetMailbox = Exchange Guid of the future mailbox.
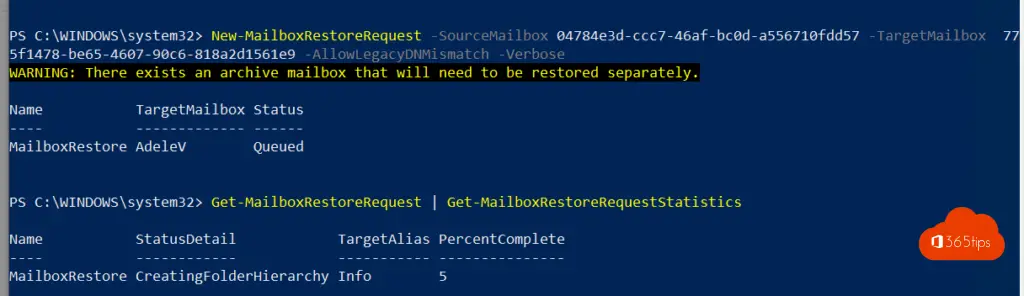
New-MailboxRestoreRequest -SourceMailbox 04784e3d-ccc7-46af-bc0d-a556710fdd57 -TargetMailbox 775f1478-be65-4607-90c6-818a2d1561e9 -AllowLegacyDNMismatch -Verbose
The source is indicated in red.
The target is indicated in yellow.
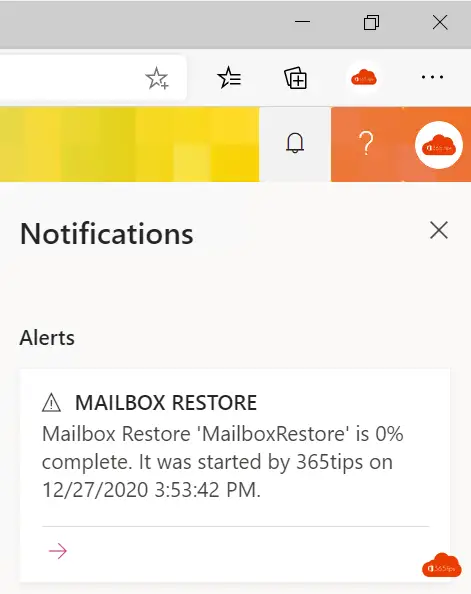
The mailbox restore was started in Exchange Online
The MailboxRestoreRequest is a job that will restore the mailbox to the new mailbox. (target)
Request a migration status from PowerShell?
To retrieve a status you can enter the command below.
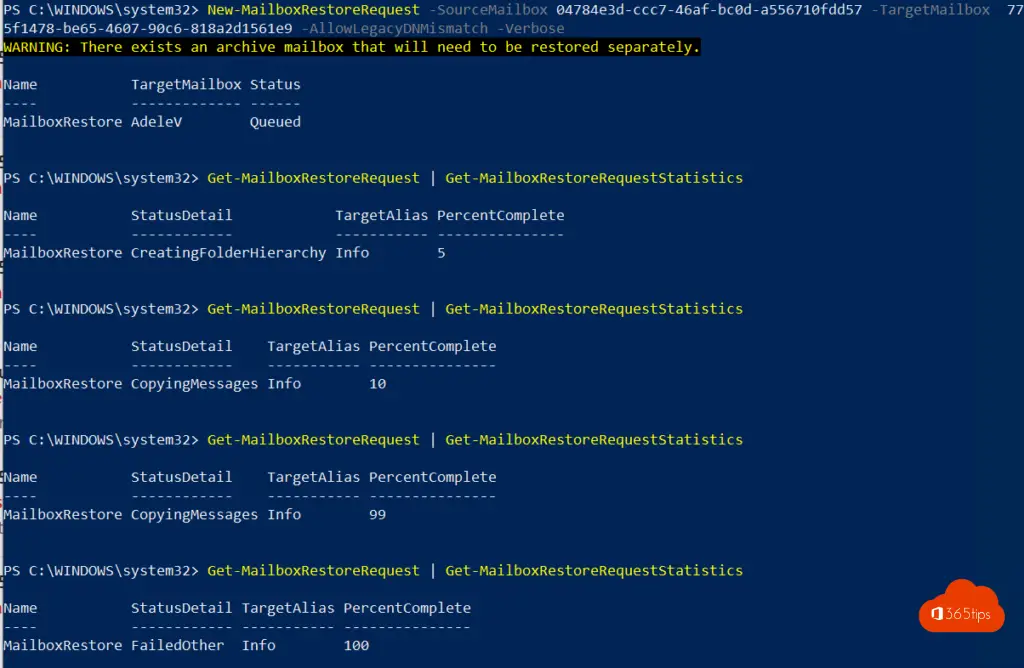
Get-MailboxRestoreRequest | Get-MailboxRestoreRequestStatistics
How can you perform quality control of imported emails?
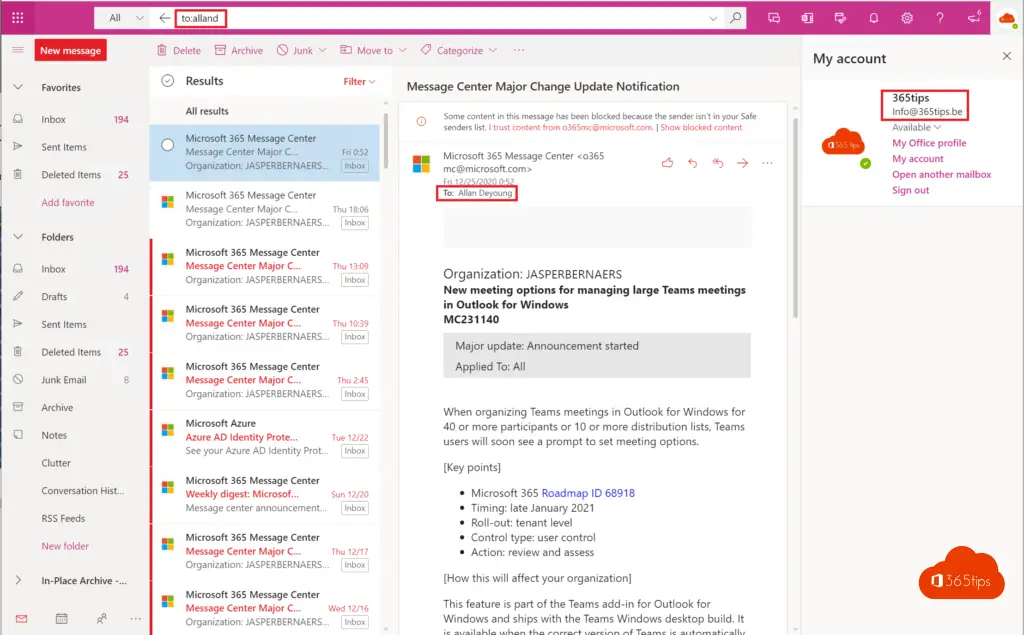
In this image, you can observe that all of Allan's mails have migrated into the mailbox at info@365tips.be .
On the right you can see that this use is logged in as info@365tips.be
In the mail recipient, you see Allan.
Definitely don't forget to migrate the archive as well!
This can be done the same way but with the ArchiveGuid.
Also read this Office 365 Exchange blogs
Out of office set up on a Office 365 Shared Mailbox
Recover deleted Exchange emails - New Exchange Portal
Set up forwarding in Office 365 | Email forwarding
Remove Azure AD Connect and make all objects cloud managed
Automatically save sent items to your shared mailbox
