Block forwarding in Exchange Online in Microsoft 365
Enable users to request access to forward emails outside the organization for a specified amount of time
A while ago, Microsoft disabled sending emails to external people or private email addresses. This benefits users who send organization documents or e-mails to other e-mail systems for no reason.
In an attack on an Office 365 account, forwarders are often set up that are active for long periods of time without the user noticing. To counter this, it seems good to me at least not to allow forwarding of emails. If you would allow it, yet not for everyone, follow this blog.
In this blog, I explain how to configure email forwarding as an administrator. I then explain the process of how users can make their own requests.
1. Open Identity Governance in Azure
Browse To: https://portal.azure.com/#blade/Microsoft_AAD_ERM/DashboardBlade/elmEntitlement
Or Browse to the Azure Portal and search for Identity Governance.
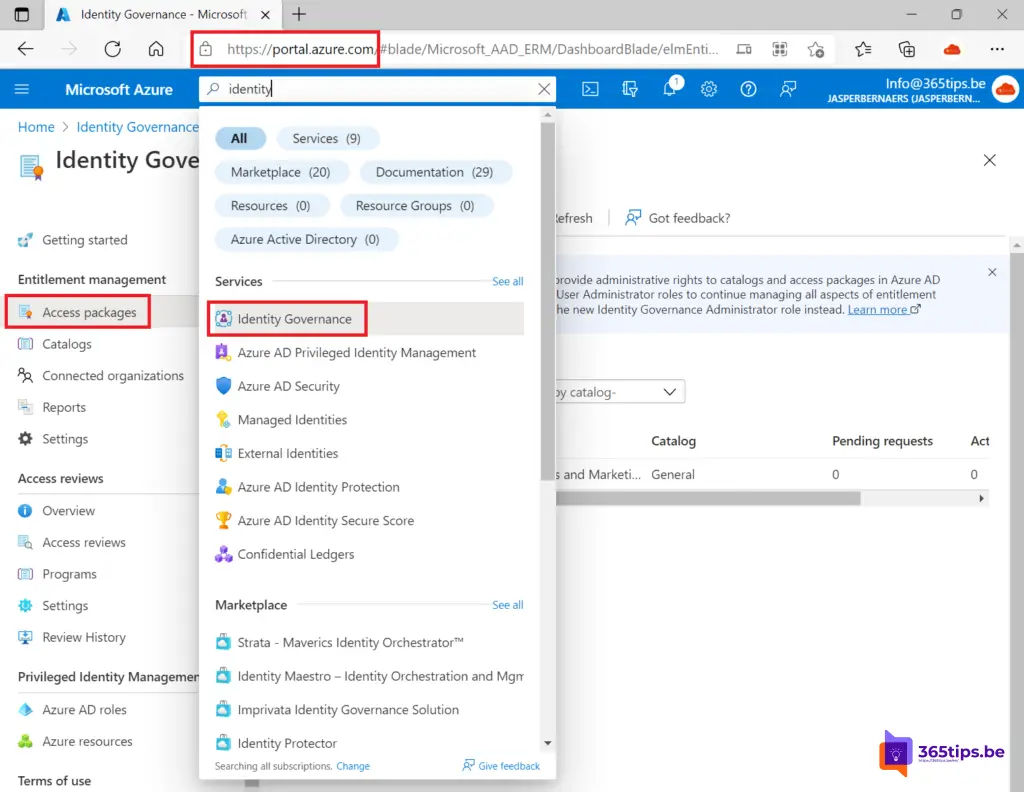
Then on the left side, press Access Packages.
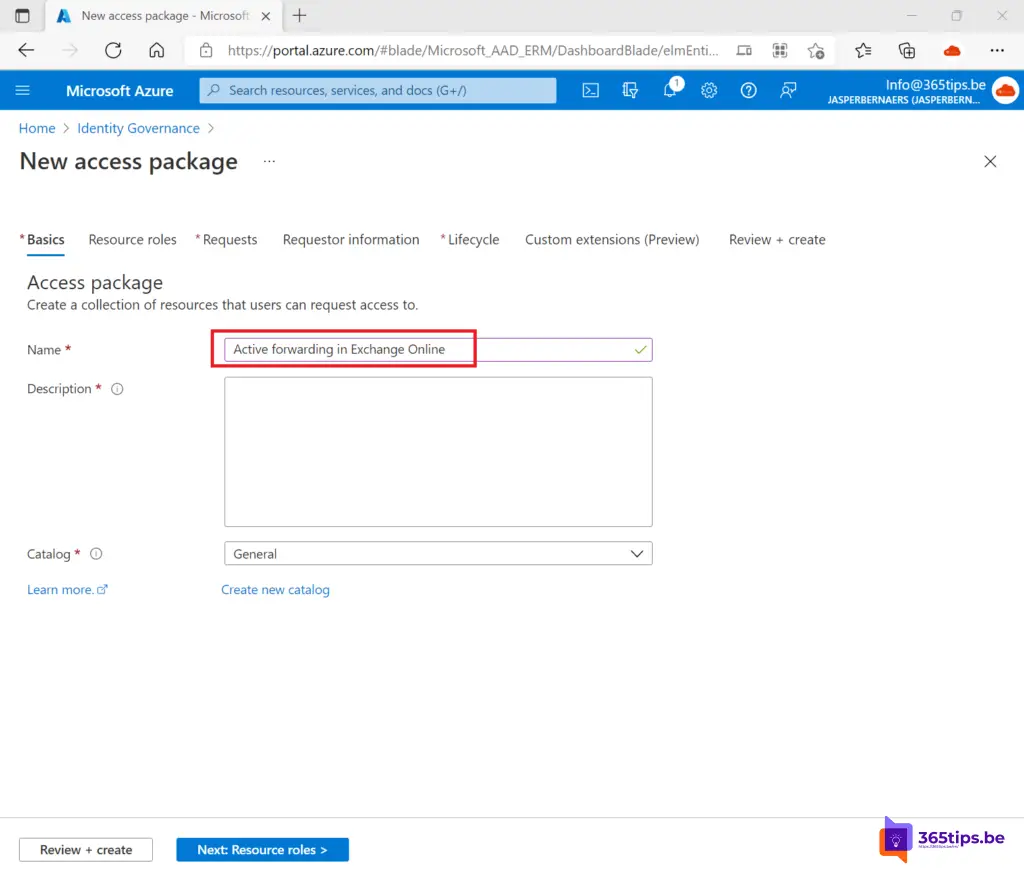
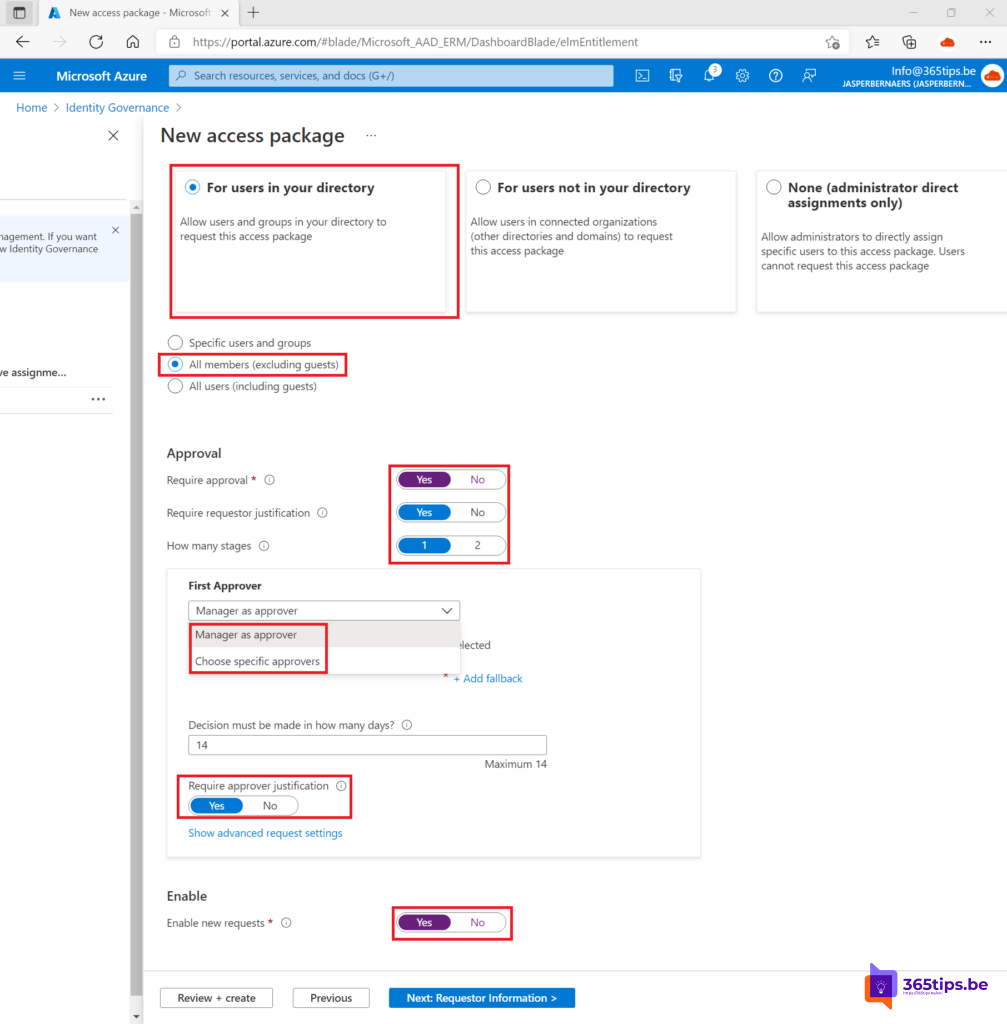
2. Create a new Access Package in Azure Identity Governance
Press Create Access Package and then choose a distinct name.
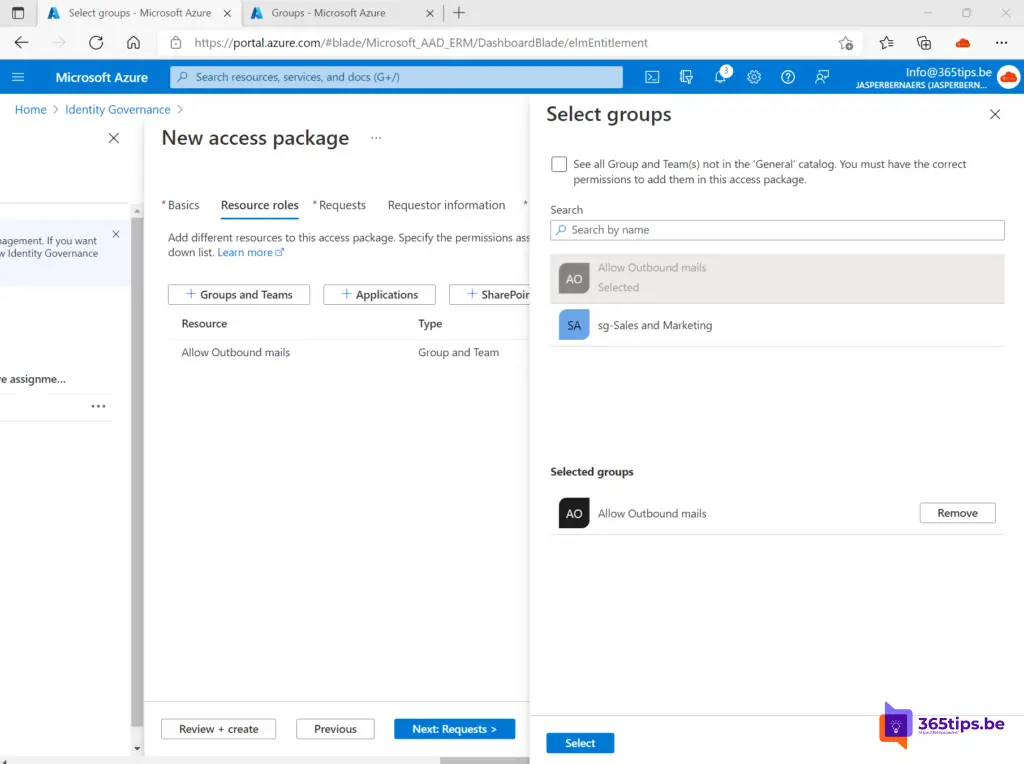
Add the group to Resource Roles. This Exchange Security group has the rights to send emails outside the organization.
Then activate the conditions of the approvals.
I chose to just:
- Admitting people who are not guests. All internal employees have access.
- The first approver is the immediate manager. Here, an IT-Staff can also be a designated team. Still, business users are always more powerful to choose.
- New applications are allowed. (bottom option)
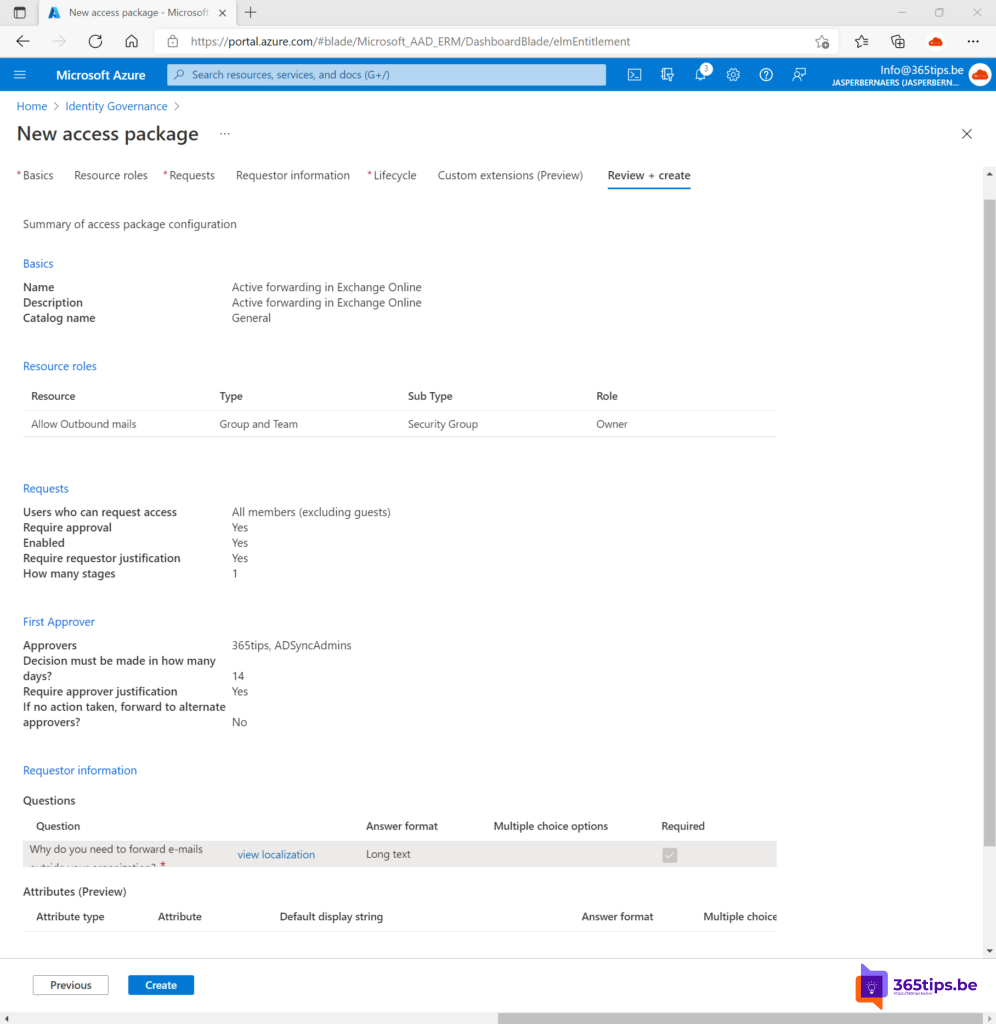
Configure the lifecycle of the Access Package. I have chosen that the Assignment will expire after 5 days.

Then press create to complete and save this Approval Flow.
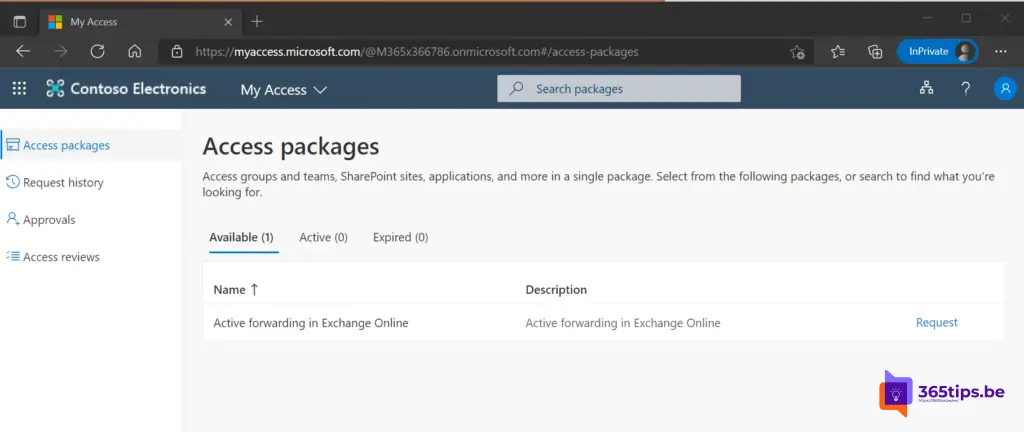
3. End users navigate to Microsoft's MyAccess Portal
Myaccess portal link: https://myaccess.microsoft.com
You can publish this URL on Intranet, SharePoint or in Microsoft Teams.
In this case, I have a test user who will now go through the process.
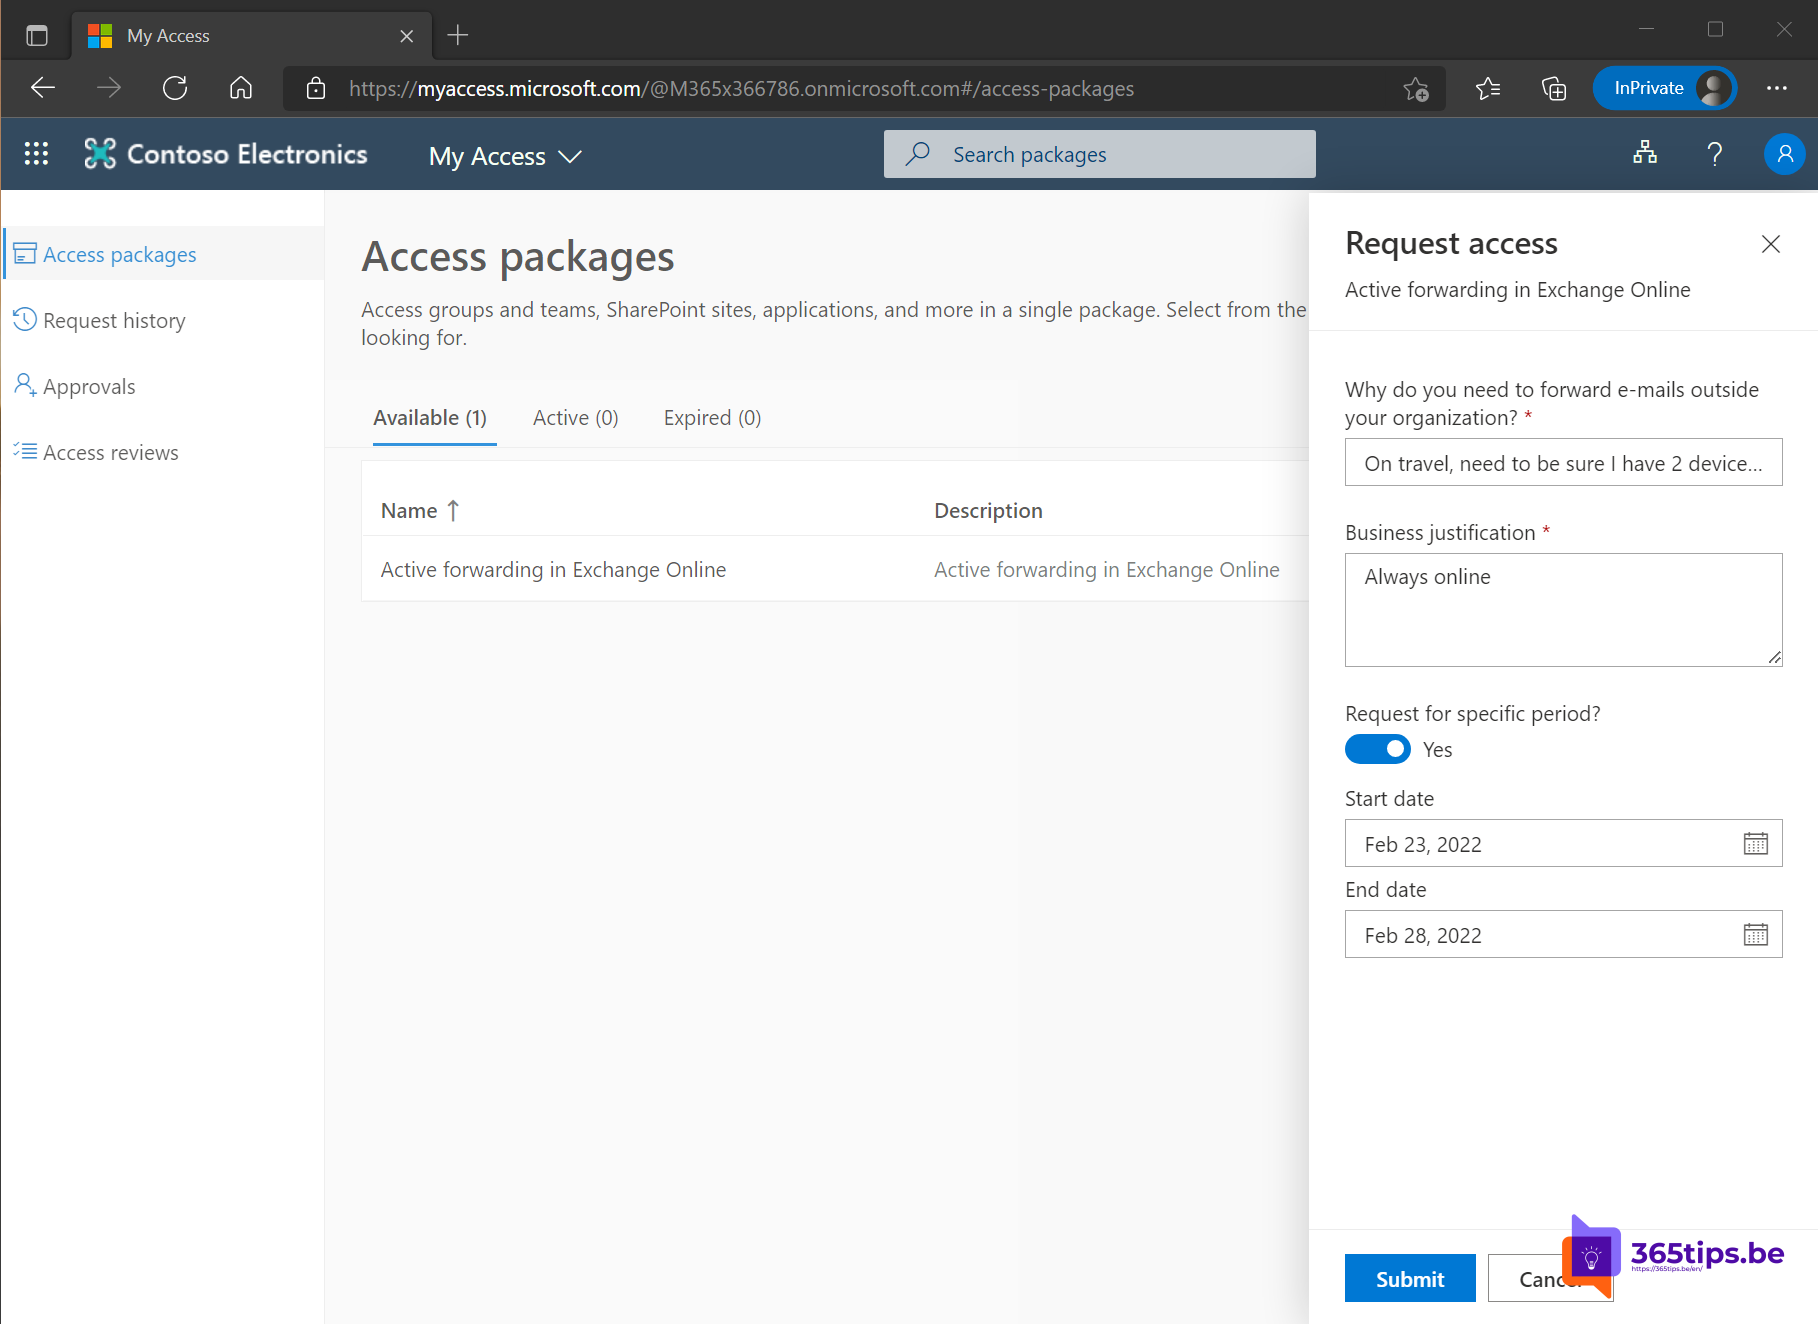
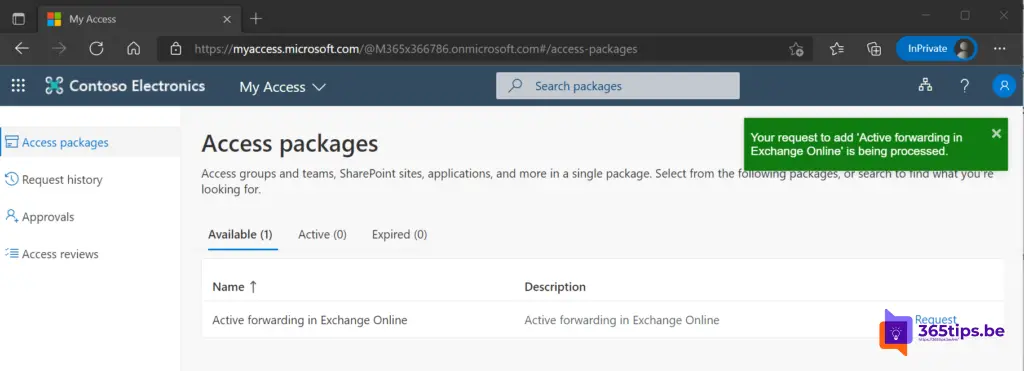
The test user can click in MyAccess on: execute request.
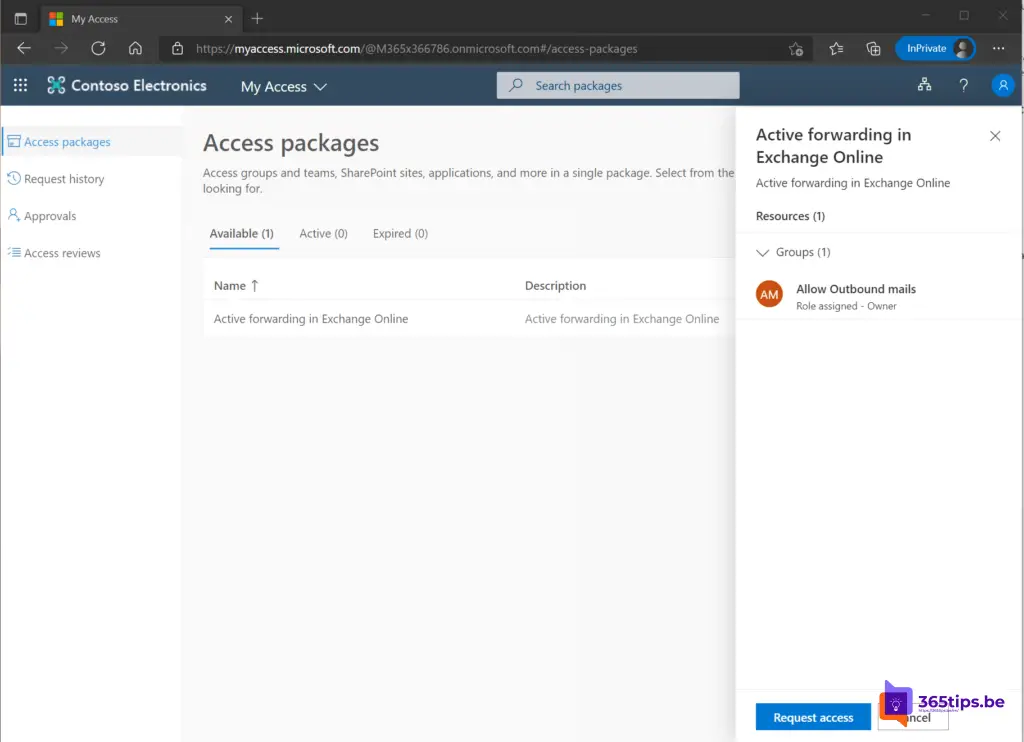
The user will need to fill out the form with the reason for setting up a forwarding.

The application has been sent. Note: The screenshot above has too many days selected that do not fit the policy!
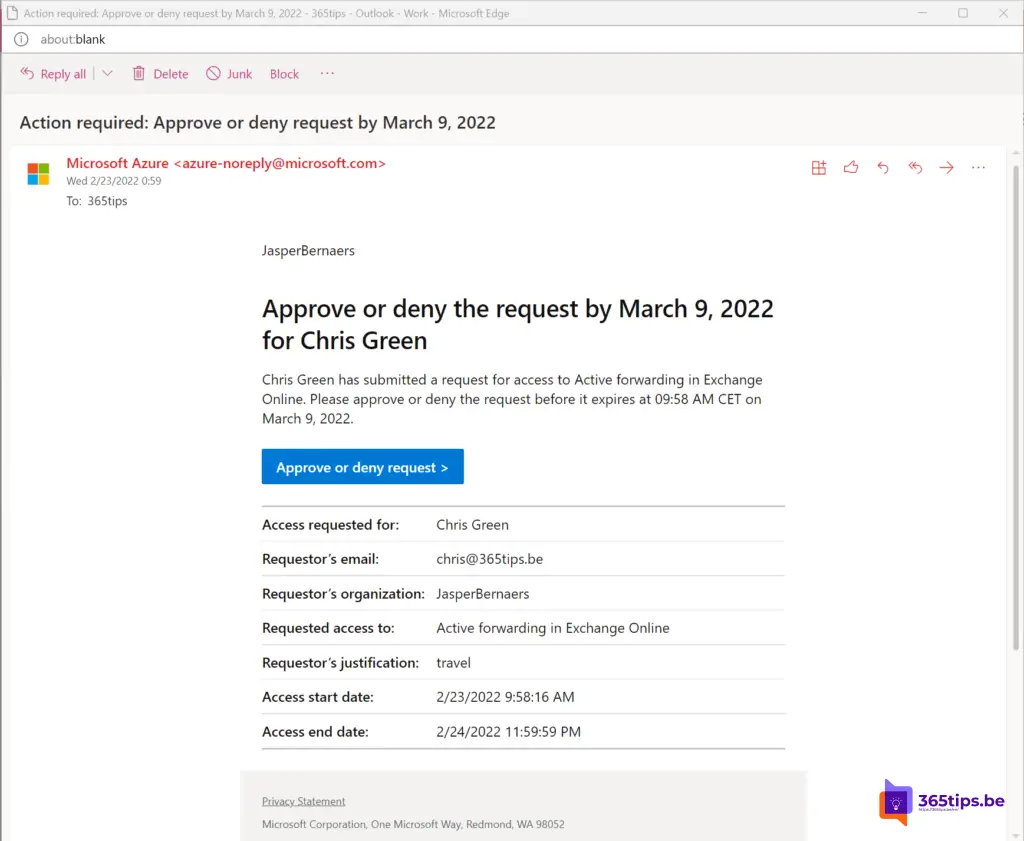
A request arrives in the manager's mailbox or designated individuals or groups.
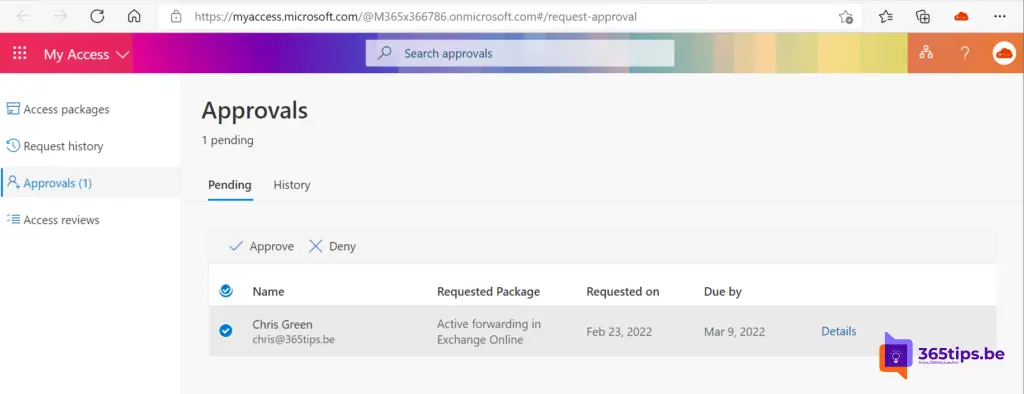
4. Approval by manager or IT Staff.
Then approve or reject the application.
5. Summary
- Groups are used for each approval flow. Groups can be used for multiple repetitive tasks. In this way, you can delegate tasks and processes in the organization.
- Microsoft 365 E5 or Azure AD premium licenses are required.
- With simple processes like this, there is also an action log that allows you to go back in time and do re-evaluations.
- If you want to test properly, it is sometimes useful to create your own tenant and then activate 30 days of E5 or Azure AD Premium P2 to be activated.
Also read
Get results faster with approvals in Microsoft Teams (Approvals)
Create an approval flow within SharePoint or Teams
Sending an email using an alias in Exchange Online - Microsoft Outlook
Office 365 setting up alert policies
