#4 Microsoft Lists - Converting an Excel file to a List
This blog post belongs to the Microsoft Lists series
#1 Lists - What is Microsoft Lists or Lists?
#2 Lists - Using Microsoft Lists in 3 steps!
#3 Lists - Using a current SharePoint list in Microsoft Lists.
#4 Lists - Converting an Excel file to a List
#5 Lists - Sharing a list with colleagues so they can enter data
#6 Lists - Microsoft Lists in Teams is now generally available (GA)
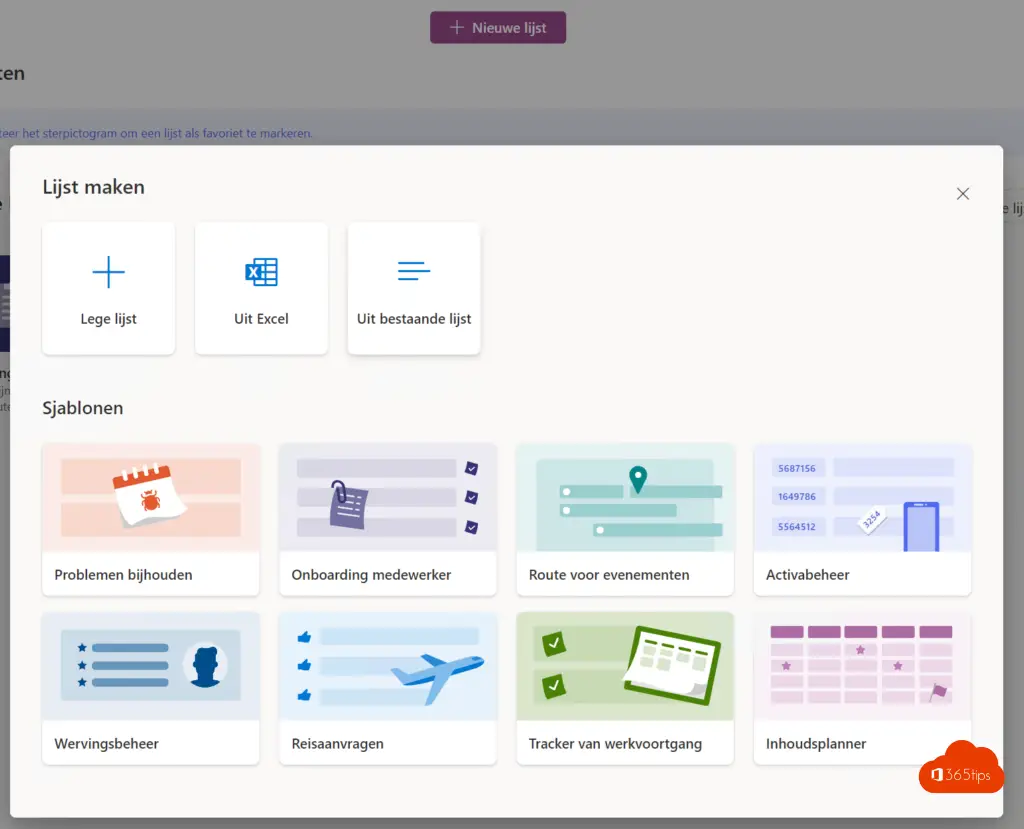
Create a new list
Open your Microsoft Lists web application via this blog and at the top press New List - Select From Excel
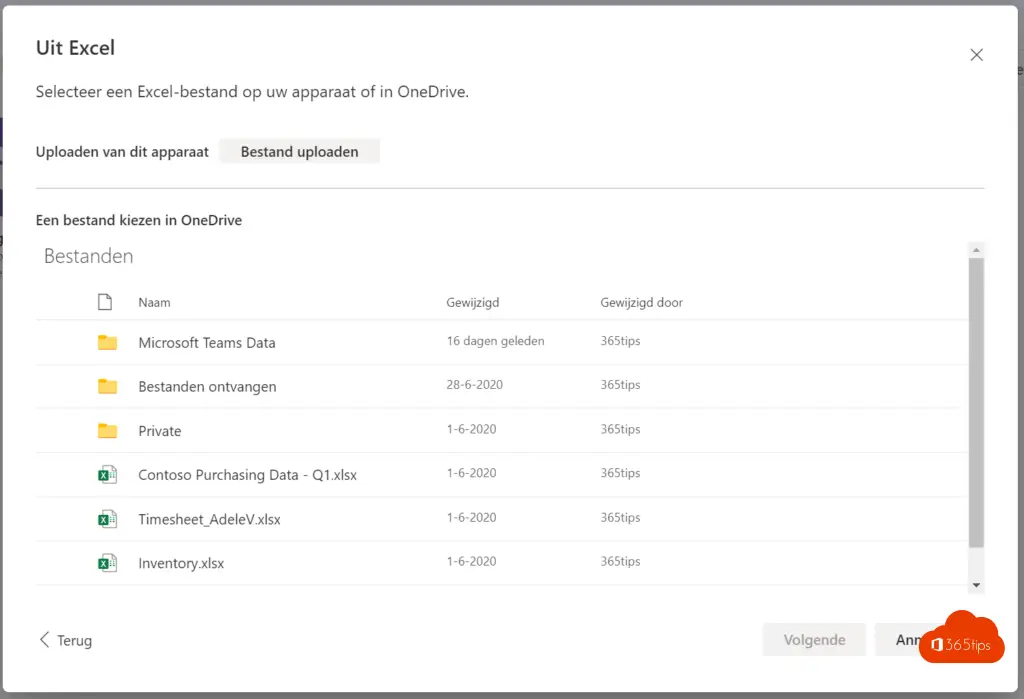
Choose your Excel file
Select your Excel file or upload a file of your choice
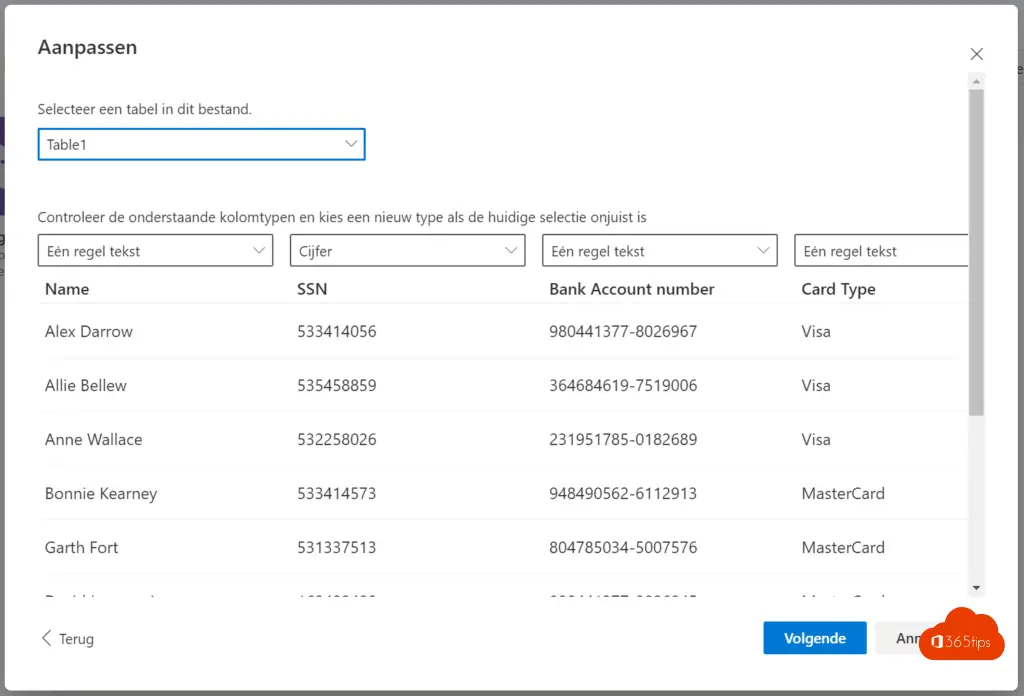
Select the table layout
In this step, it is important to check that the 'headers' are correctly applied to the columns. Then press next.
Your list has been created
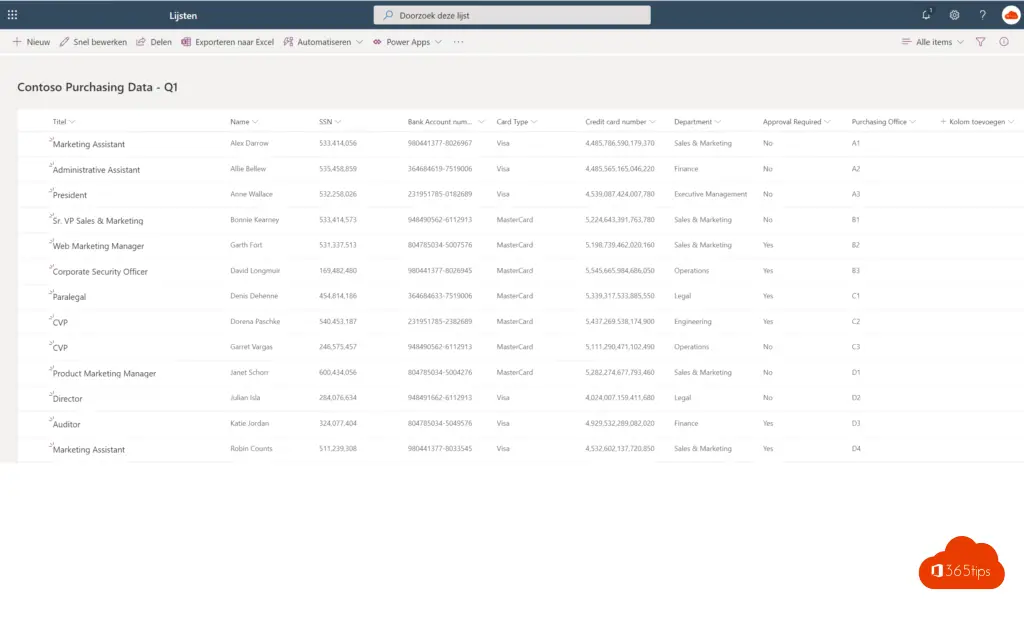
Below you can see a better graphical proposal of your Excel List.
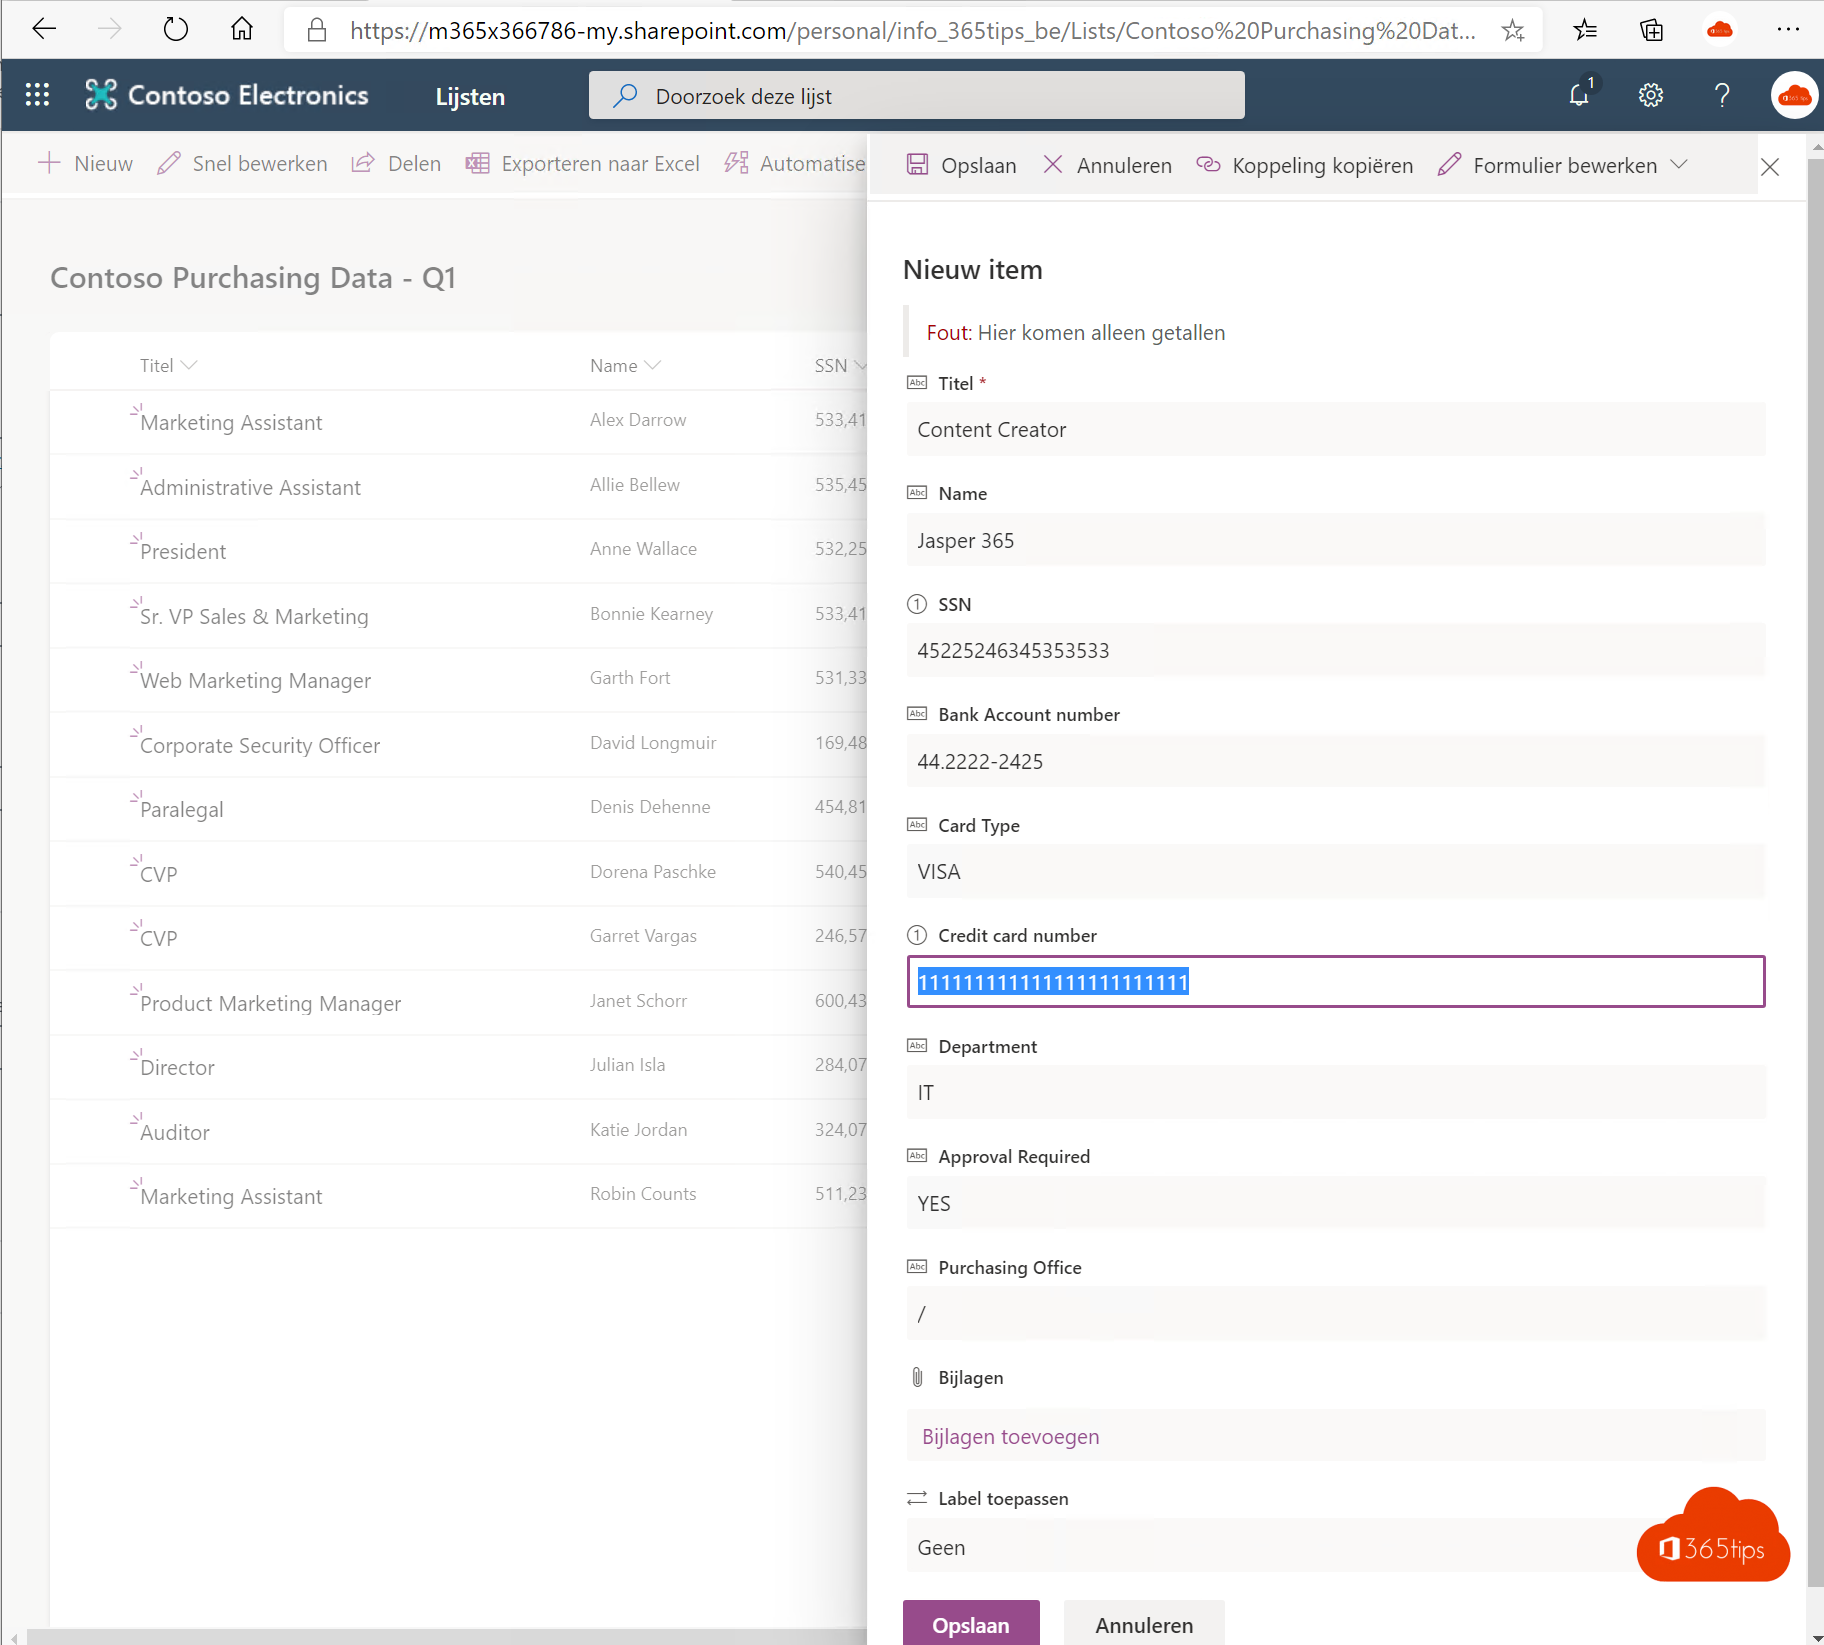
Data input!
Use the form to enter your new list. See example below.

Tips & tricks
Leaving input files lying around on Microsoft Teams, OneDrive, SharePoint or other places. If you have turned your Excel file into a list, it is better than not touching the static documents. Possibly delete or move to your own OneDrive.
Policies & rules (Governance) are fundamental to using Microsoft Lists. Where do you place Lists? How best to access them? Who is allowed to create lists? Who has access to these lists? These issues are best defined. Using best-practices and guidelines within departments, services or the entire organization.
Lists for individuals can be placed on personal OneDrives just like Excel files. Lists that will be used by a team should be placed on a Microsoft Teams site. And finally, lists that can be accessed by the entire organization should be placed in Microsoft Teams (public) or on SharePoint .
